

Everyone has their snack or meal of choice that they’ll gravitate towards if they’re eating alone, or if they need a snack between meals. My husband, for instance, is a big breakfast cereal guy. Any time of the day or night is the right time for a bowl of cereal, in his opinion. As for me? Toast has always been that go-to meal or snack for me. It’s quick and easy, and it’ll tide me over until my next larger meal.
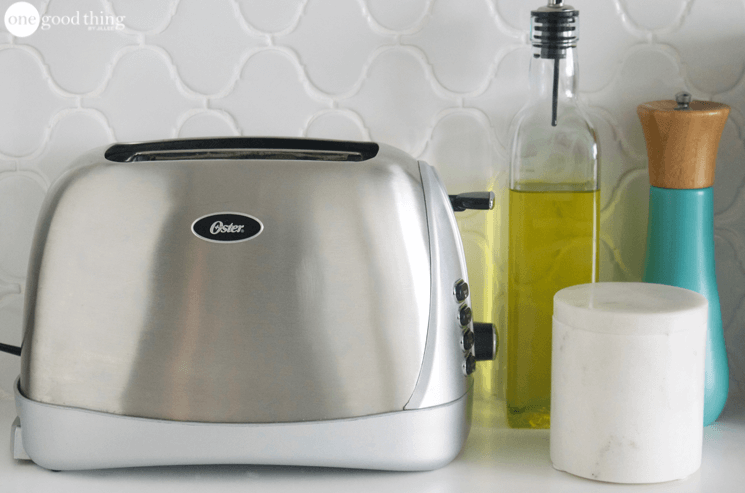
My fairly regular toast habit requires a lot of work from my toaster throughout the week. I was standing at my kitchen counter just a couple of days ago when I had a moment of realization – my toaster was actually getting kind of gross. There were crumbs everywhere, and the outside was covered in a layer of greasy splatters from the nearby stovetop. And that just wouldn’t do! My toaster is an important appliance in our house, so I thought it was high time I gave it a good dose of TLC!
So I set aside a little bit of time and gave it the long overdue cleaning it deserved! It’s now sitting on my countertop looking as good as new! I’m sharing my process with you today so that everyone can take a few minutes and give their toasters the love they have earned! :-)
How to Clean Your Toaster
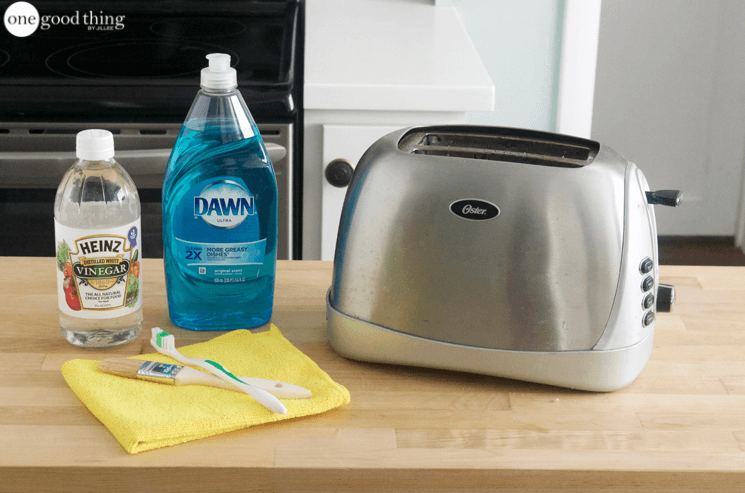
Recommended supplies:
- White vinegar
- Dawn dish soap
- Clean microfiber cloths
- Paintbrush
- Toothbrush
- Scouring pad
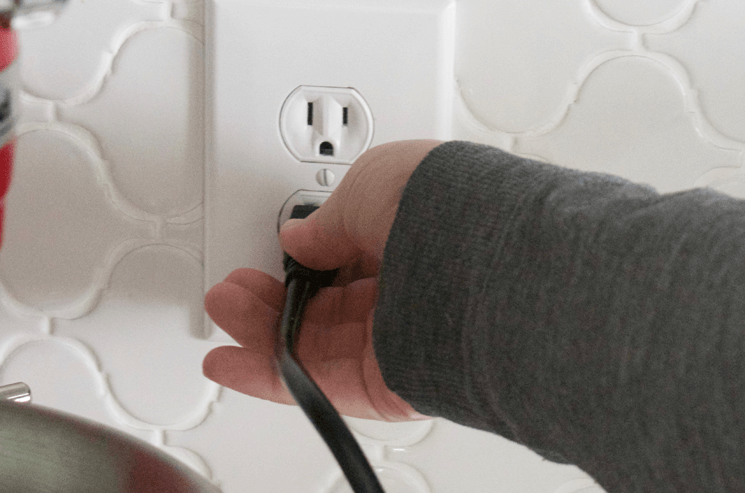
Step 1 – Unplug
The first step before doing any cleaning or maintenance on an appliance is to unplug it. Safety first!
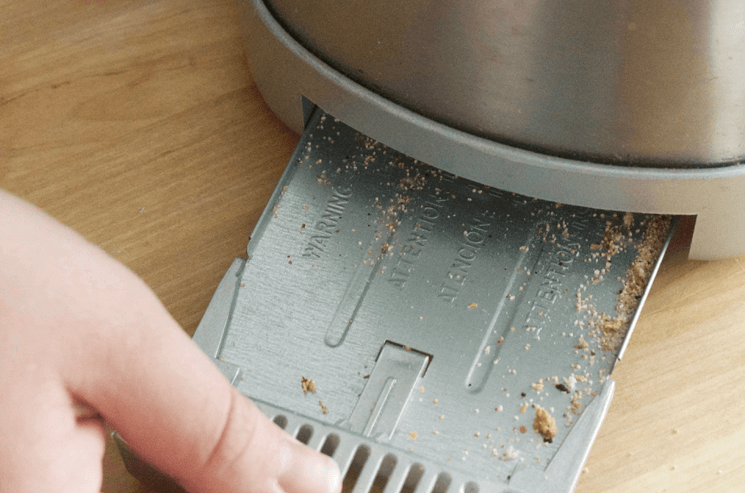
Step 2 – Crumb Removal
If your toaster is anything like mine was, chances are pretty good that there are crumbs everywhere. Most modern toasters have a crumb tray that slides out, often at the back of the unit near the bottom. Slide the crumb tray out and dump the crumbs, then set the tray aside for now.
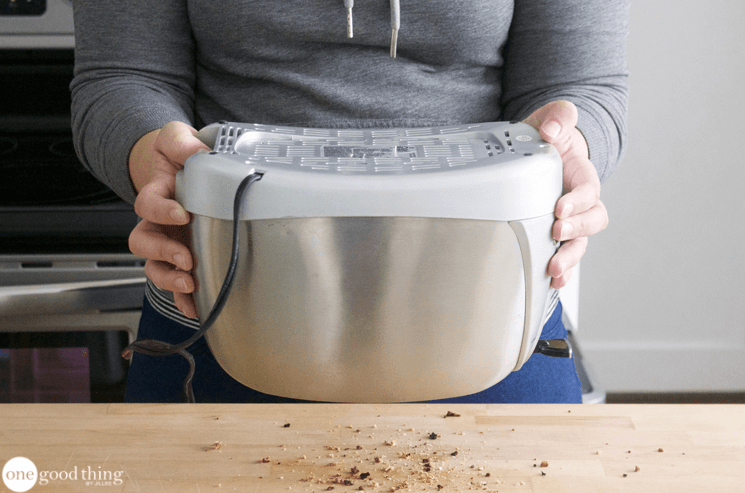
Hold the toaster over a sink or garbage can and give it a gentle shake to dislodge any crumbs that may be trapped in the inner workings of the toaster.
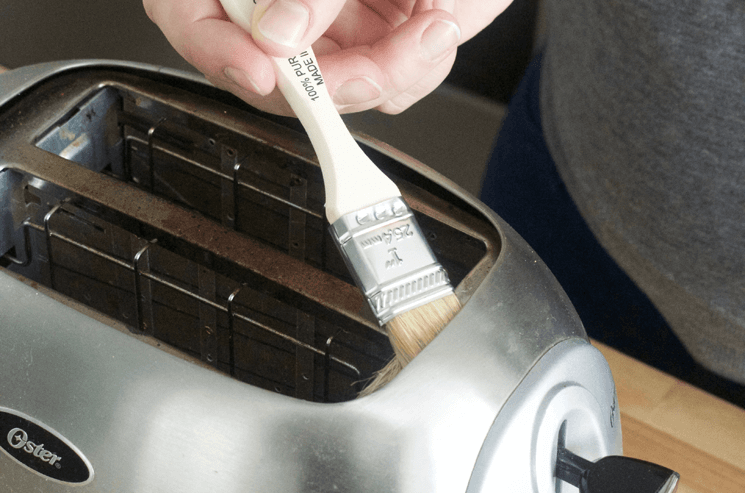
If there are crumbs stuck in hard-to-reach places, use a clean paintbrush to brush them out. (Cheap paintbrushes are a handy thing to have around for a lot of cleaning and maintenance tasks!)
Related: Handy Hacks For Spring Cleaning Your Car
Step 3 – Scrub
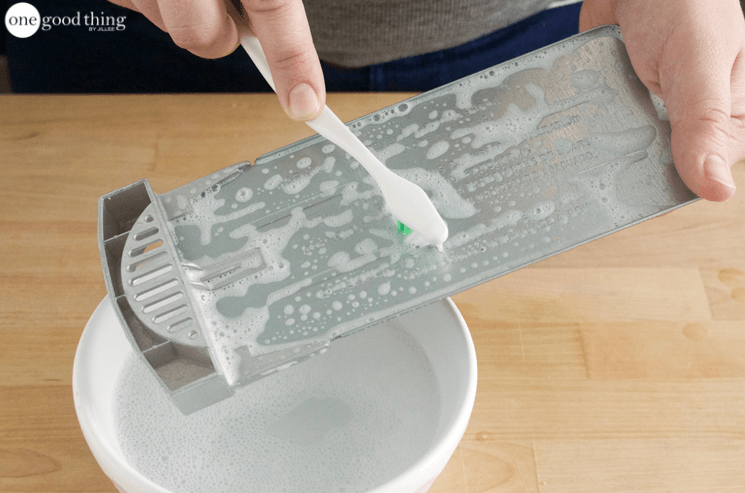
Now that the crumbs are gone, you can scrub and/or wipe down any surface that needs attention. Don’t forget about your crumb tray! Use a toothbrush or sponge to wash it down in warm, soapy water. Dry completely with a towel and replace the tray in your toaster.
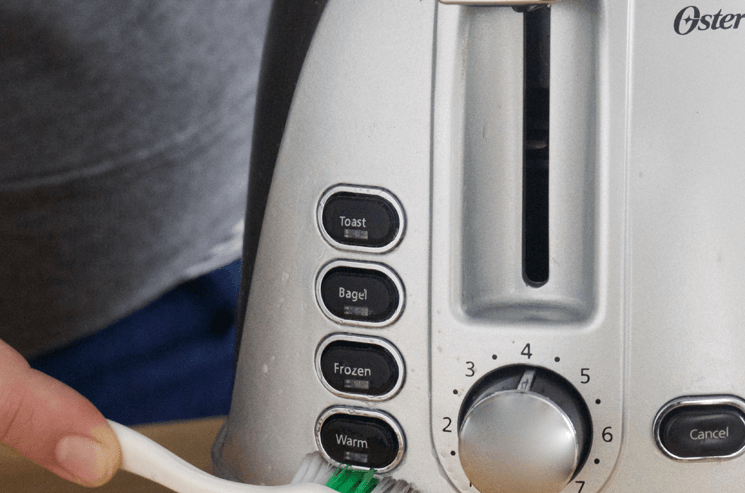
If you’re having trouble cleaning hard-to-reach areas, you may want to try using a toothbrush!
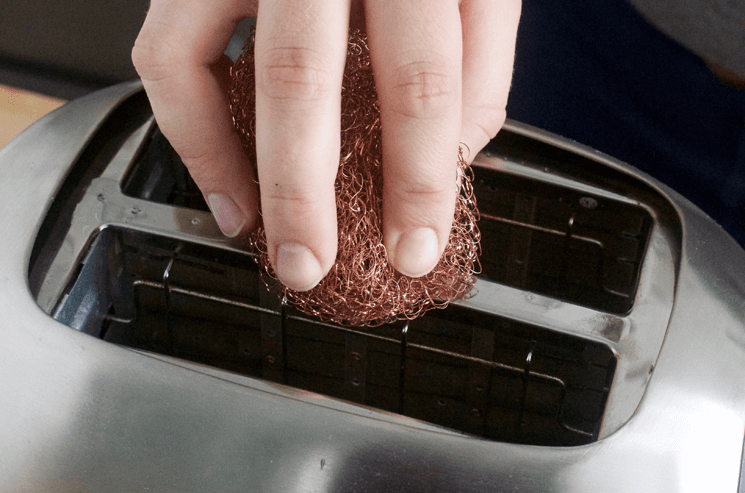
If your toaster is super greasy like mine was, use a scouring pad and some dish soap to help power through the grime. It may take a bit of scrubbing, but the end result will be so worth it!
Step 4 – Dry & Admire
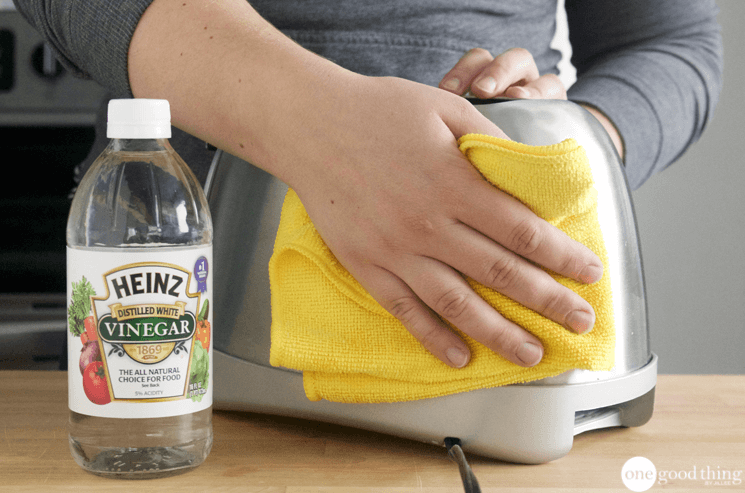
After everything is clean, take a couple of extra seconds to give it a nice shine with a little bit of white vinegar and a dry microfiber cloth. Once all the surfaces of your toaster are dry, put your crumb tray back in place.
Plug your toaster back in, step back, and admire your handiwork!
More Ideas You'll Love

Do you keep your toaster out on the counter?


great information for sure.
Please log in or create a free account to comment.Good old white vinegar to the rescue again, is there anything it can’t clean!?
Please log in or create a free account to comment.I have placed a new wash cloth over my toaster when not in use for years to keep the out side clean. This helps to avoid dirt and oil from forming on the toaster it self.
Please log in or create a free account to comment.Thanks for the tips Jillee! I wish there was a way to clean the inside of the toaster! Mine gets gunked up and it looks so nasty inside!
Please log in or create a free account to comment.Many of the crumbs in my toaster don’t like to drop out, so I grab the compressor hose, step out the back door and blast the crumbs into the yard.
Please log in or create a free account to comment.I’d like to be able to print tips without the pictures on several pages. Is there a tip to print just the words on one page? Thanks.
Please log in or create a free account to comment.You may need to copy each section of text to a new document and print.
Please log in or create a free account to comment.If you copy the entire article into a program like One Note or Word, you can delete what you don’t want and format for printing.
Please log in or create a free account to comment.Great tips. I wipe the tray and gently shake our toaster outside in nice weather, away from the house, to remove the crumbs. Less mess in the kitchen, and outside critters appreciate it.
My favorite all-purpose small cleaning brush is an old typewriter brush used to clean the striker keys. It’s always at the kitchen sink. I wish I could find more of these.
Please log in or create a free account to comment.The tooth brush is a handy tool to clean appliances… Thanks for the tips!
Please log in or create a free account to comment.toothbrushes are not just for teeth and appliances, but oh so useful for cleaning around faucets, in the shower around the bottom tray where the doors slide and around window casings as well as a multitude of other areas as well…………….
Please log in or create a free account to comment.Toasters and other small appliances should be unplugged between uses. I learned this from the fire department when they did a free inspection of my home many years ago. Keeping toasters, coffee makers and such plugged in creates a fire hazard. Same with hairdryers, curling irons, etc. Be safe, clean your toaster often, and never throw out a toothbrush!
Please log in or create a free account to comment.Glad I’m not the only one that keeps a tooth brush in the kitchen . It’s such a great cheap tool. Thanks for you advise.
Please log in or create a free account to comment.I am so doing this TODAY ! Thanks for this much needed tip !
Please log in or create a free account to comment.To keep crumbs from invading the counter in between cleanings, I keep a rectangular aluminum cake pan under my toaster….no more crumbs on the counter!
Please log in or create a free account to comment.This is good to know. I just had to shake our toaster out the other day. It every so often makes a burning smell and shaking out the crumbs usually takes care of it.
Please log in or create a free account to comment.I’ve found that shaking out the crumbs CREATES the burning smell. The crumbs get caught in the coils, so that when the coils heat up again, they burn the crumbs, causing the smell.
You should always keep the toaster right-side up when shaking it out, to prevent this from happening. If a crumb is big enough, it can actually catch on fire. That’s why the crumb tray is at the bottom, so that you don’t have to turn it upside down. :)
Please log in or create a free account to comment.Great tip with the toothbrush and vinegar. I usually just use a sponge and dawn dishwashing liquid. Thanks for all your great ideas!
Please log in or create a free account to comment.Great stuff! I’m convinced that manufacturers design their appliances to have ins and outs that collect grime and resist cleaning. Your paintbrush tip is brilliant – it should root out those big stubborn crumbs that get wedged in. My toaster’s stainless steel dividing bar between the bread slots is what needs the elbow grease. A paste of baking soda works well. In general, another useful cleaning tool is a wooden cocktail stick – perfect for getting into tiny spaces, and it won’t scratch surfaces.
Please log in or create a free account to comment.Great tips! You know, I’ve been to tons of yard and garage sales where the poor grungy toaster gets passed by all to often, most people can’t give them away. But then there is that one person’s sale where she must be a fan of yours and every small appliance sits gleaming with $15 price tags and they go like fresh donuts!
Please log in or create a free account to comment.