


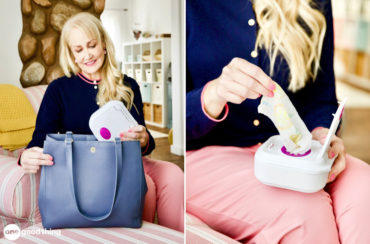
Between cutting your laundry drying time in half and eliminating the need for fabric softeners and dryer sheets, the benefits of dryer balls make DIY dryer balls an attractive project by any measure! Adding a few wool balls to your dryer can cut drying times by 25-50 percent, making them one of the most frugal laundry hacks out there.

I’m such a fan of them that I made my own set of wool dryer balls that you can buy online in my shop! For those who would rather DIY than buy, never fear, because I’m sharing not one, but two easy ways to make them in this post. Whether you make them using wool or old socks, these simple dryer balls DIY projects are bound to be your new favorite homemade laundry product.
The sock dryer balls are not only great if you’re allergic to wool, but it’s a great way to use any orphan socks you have lying around, or an old pair of socks you don’t wear anymore.

How Do Dryer Balls Work?
Using wool dryer balls when drying your clothes helps separate the clothing, resulting in better air circulation and faster drying. The more balls you add, the more space you create, and the faster the whole load will dry. Dryer balls can also soften your clothes through gentle friction as the felted wool balls bounce against your clothes.
Felted wool dryer balls are simple to make and long-lasting, but if you don’t want to buy wool, you can make dryer balls out of old socks, too. Some people use rubber balls, plastic balls, or even tennis balls in the dryer, but both of the DIY options below will bounce around more quietly than any of those noisy alternatives!
How to Make Wool Dryer Balls Using Wool Yarn

You’ll need:
- Skein of 100% wool yarn (or unravel an old wool sweater)
- Pantyhose or nylon stockings
- Embroidery floss or scraps of acrylic yarn
Directions:

Step 1 – Form The Yarn Balls
To start your DIY dryer ball, take the loose end of the yarn and wrap it around your fingers about 20 times. Next, slip the wrapped yarn off your fingers, then wrap the yarn around that section about 20 more times to secure it.

Pinch the beginnings of the yarn ball together and continue wrapping more yarn around it, making sure to wrap it nice and tight. Once you have a round ball of yarn about the size of a tennis ball, cut the yarn and tuck the end under some of the other strands of yarn to secure it.

You should be able to make at least 3 dryer balls out of one skein of natural wool yarn.

Step 2 – Felt The Wool
The next step in the process is “felting” the wool, which involves using high heat to fuse the fibers together so the balls won’t unravel over time. (For everything you’re supposed to do when caring for wool fabrics, you’ll be doing the opposite here!)
Start by placing one of your yarn balls into the toe of a pair of pantyhose or stockings, then tie the opening closed with a piece of embroidery floss or acrylic yarn. Continue placing yarn balls into the hose and trying them off with floss or yarn until you have a pantyhose “snake” full of dryer balls.

Toss the whole thing in your washer and start a wash cycle on the hottest water setting. When the wash cycle is done, dry the dryer ball snake in your dryer on a high heat setting.

After washing and drying, the fibers will have fused a bit, and each of your homemade wool dryer balls will feel smoother and tighter. They will continue to get smoother and tighter as you use them. (They may also get slightly smaller, but that’s totally normal!)
More Ideas You'll Love


How to Make Dryer Balls Using Old Socks
You’ll need:
- Old cotton or wool crew socks (2 per dryer ball)
Directions:
Starting at the toe, roll up one of the socks as tightly as possible. Place the rolled sock on the toe of a second sock, then roll it up tightly around the first rolled sock to make a ball. When you reach the top of the second sock, fold it back over the rolled socks to hold them together.
That’s all there is to it! Since this method relies on the elastic of the socks to keep the ball together, the tighter you roll the socks, the better off you’ll be.

How to Use Your DIY Dryer Balls
Add 1-4 of your DIY dryer balls to your dryer along with your laundry and dry as usual.
You can also add a couple of drops of essential oils to the balls beforehand to infuse your laundry with a pleasant scent. (I like to add a couple of drops of Simple Clean Essential Oil Blend to my dryer balls — it makes my clothes smell so nice!)
To help reduce static cling, try adding a few drops of liquid fabric softener to each ball before putting them in the dryer, or add a safety pin to one of the dryer balls.

How to Recharge Wool Dryer Balls
When wool dryer balls start to look shaggy, use a lint roller or fabric shaver to remove loose wool and lint buildup. If the balls start losing their shape or getting soft, you can “recharge” them by placing them in a pot of water, bringing it to a boil, then removing the pot from heat and leaving the balls in the water until it cools.
Another way to recharge your dryer balls is to zip them into a mesh laundry bag and wash them in hot water (gentle cycle, no detergent or fabric softener) to cause the wool to shrink and firm back up. After washing, dry the balls on high heat or let them air dry for a few days.
Unfortunately, not even the best-kept dryer balls will last forever! You’ll know your dryer balls are ready to retire when recharging them only helps for a short time. (They can still be useful after retirement, too — you can always pull them apart and use the wool for other projects!)
More Ideas You'll Love

Have you tried making your own dryer balls?


Does it have to be wool
Please log in or create a free account to comment.If you attach a safety pin to each ball that will eliminate any static.
Please log in or create a free account to comment.Judy
Thank you. I was wondering how the threads could be secured enough to survive the dryer. Another item[s] on my shopping list for Saturday’s shopping.
Please log in or create a free account to comment.I have used vinegar for the rinse cycle and wool dryer balls for years. You can’t beat the combination. Vinegar helps in keeping the front loader smelling clean and the wool dryer balls speed up my life. No fabric softener residue on either machine or in the fibers of the clothes. Which also helps the clothing last longer. And everything is cheaper. Win win.
Please log in or create a free account to comment.Jillee…..Any idea as to how to remove the build up of fabric softener from dryer sheets in the dryer before switching to this healthier method. I’d hate to have the dryer balls absorb the buid up. Read somewhere that alcohol will work but fear that any leftover fumes could cause a fire when the dryer is used.
Please log in or create a free account to comment.Question… one skein makes 3/4 dryer balls, correct?
Please log in or create a free account to comment.Yes! :-)
Please log in or create a free account to comment.Can u felt a bunny or thing outa the dryer balls ??
Please log in or create a free account to comment.I haven’t tried it, but I don’t see why not! :-)
Please log in or create a free account to comment.Jillee, do you know any way to clean the woolen felted balls periodically? I’ve been using a set that I bought, for about the last 3 years, and they are kind of grungy looking.
Please log in or create a free account to comment.Just run them through the washing machine! :-)
Please log in or create a free account to comment.Thanks. I seriously hadn’t thought of that. must be my diabetes affecting my brain. That’s my story and I’m sticking to it!
can you use dryer sheets with wool balls?
Please log in or create a free account to comment.You don’t need to, but I suppose you could :-)
Please log in or create a free account to comment.I would think all that toxic garbage on the dryer sheets would coat those dryer balls if used together, I would want the dryer ball to draw out moisture from the drying clothing and do their job, our bath towels aren’t supposed to be dried with those toxic sheets because they coat the fibers of the towel taking away some of the wicking values ??
Please log in or create a free account to comment.I volunteer for the local senior center herein town, 5 days a week I do the laundry. When I place wet laundry In the dryer and want to speed up the drying time, I also place a clean dry turkish bath towel in. As the clothes are drying this towel helps to remove the moisture in dryer and clothes dry faster.
Please log in or create a free account to comment.I bought the dryer balls from Amazon that you shared a link for. So far, I love them! I do have a question, I put a few drops of EO on them before drying a load of towels and I didn’t really notice any scent? Is there certain scents that create a better scent than others? And what would you recommend? Have you even made or used a dryer ball spray using vinegar and EO?
Please log in or create a free account to comment.I would recommend lavender! Try a few more drops – it’s subtle, but you should be able to notice it :-)
Please log in or create a free account to comment.It could be the brand of EO you are using. Make sure any EO you are using is pure therapeutic grade.
Please log in or create a free account to comment.You might want to mention that wool can absorb SIX times its weight in water which means that they will readily absorb the moisture from your clothes, significantly cutting down on dryer time.
It is important to note that Super Wool or Super Washed Wool will NOT work for this project because the wool does not felt, therefore it does not hold together in a ball.
Wool also resists taking on odors, particularly urine, which make it the go to fabric for diaper covers… if any one is interested in the most eco friendly way to keep your little darling clean and fresh. Old knit patterns for diaper covers were often called “diaper bloomers” and are very simple to knit.
Please log in or create a free account to comment.Great tips, thanks Susan!
Please log in or create a free account to comment.About the only memory, I have of my early childhood is those terrible scratchy soakers. I guess they are good for early potty training.
Please log in or create a free account to comment.My fuzzy jammies get static cling in the winter as well. One tip someone told me is to keep a metal hanger handy and pull items through it to help remove some of the static. It doesn’t completely solve the problem, but it has sure helped a lot. It is worth it to me not to have all the chemicals against my skin.
Please log in or create a free account to comment.Is the nylon stocking removed after the felting step?
Please log in or create a free account to comment.Yes!
Please log in or create a free account to comment.Do the dryer balls create friction on the clothing? Won’t the fabric show wear faster?
Please log in or create a free account to comment.Not that I’ve noticed! They are very gentle :-)
Please log in or create a free account to comment.Dryer sheets should not be used on towels or microfiber cloths since the towels won’t be as absorbent and the microfiber cloths won’t be as effective in picking up dirt. Are these (or any other) wool balls okay to use on towels and microfiber cloths?
Please log in or create a free account to comment.They are a much better alternative to dryer sheets for towels and microfiber! :-)
Please log in or create a free account to comment.Wondering…do the dryer balls make a lot of noise in the dryer? It would be a serious thing to consider for me.
Please log in or create a free account to comment.Thanks!
Not really. It does make a bit more noise as the balls hit the sides of the dryer but it’s sporadic and not noticeable after you get used to it. Well worth the time to assimilate!
Please log in or create a free account to comment.Not really!
Please log in or create a free account to comment.Is there a discount code to order these via Amazon? Also, can these be used to fluff pillows as they dry in the dryer after washing? I wash my pillows A LOT! I usually buy new pillows about every 4 months anyway. I can not sleep on a flat pillow and I do not like down pillows because of the bunching.
Please log in or create a free account to comment.I toss in three tennis balls with my pillows and it fluffs them nicely!
Please log in or create a free account to comment.If you do not like a flat pillow you should buy My Pillow…they are very fluffy!!!Not to mention big and puffy
Please log in or create a free account to comment.If I wear wool clothing, I have an itchy reaction. Would wool dryer balls have this same effect? I will try the suggestion to roll up a pair of socks and tie them in a nylon. Love all the good ideas from One Good Thing!
Please log in or create a free account to comment.Using these dryers shouldn’t make you itchy at all :-)
Please log in or create a free account to comment.it may be just a specific type of wool you are allergic to, alpaca is most commonly used but you might want to try merino or cashmere
Please log in or create a free account to comment.How do you suggest tying of the end piece of yarn to discourage unraveling even further?
Please log in or create a free account to comment.I just tuck the end piece under a few other pieces :-)
Please log in or create a free account to comment.The only fabric softener I use is vinegar in the washing machine. I’ve found that the only time my clothes get static cling is when I over dry them in the dryer. My dryer does not have a buzzer to signal when the timer is done so I have to go check on my clothes often. I’ve found if I put the clothes on the spin cycle a few times, the clothes will dry faster in the dryer. We don’t use the dryer much because we hang our clothes on drying racks or on tension rods in our hall. So if you don’t want static cling don’t over dry your clothes.
Please log in or create a free account to comment.Wow, what a great idea, I love it. I will be making these. Thank you for sharing this excellent idea.
Please log in or create a free account to comment.I made these several months ago and Yes I agree these balls help with the drying process. But to give all a heads up. Because theses balls are made of wool they increase the amount of lint that is produced in your dryer. Even though I clean my dryer lint screen every time I noticed a lot more lint. My dryer has never over heated before but after several months of using them my dryer overheated. I don’t use fabric softner in my washer – I use white vinegar which does a great job so I am all in on using these wool balls instead of dryer sheets. This is more of a word of caution and be mindful of your dryer “health”. Thanks for the post on how to make these dryer balls.
Please log in or create a free account to comment.I purchased wool dryer balls from Amazon and I do not notice any extra lint from them nor dryer overheating. That might be a difference between the purchased ones and the homemade ones. Just thought I would let you know in case you want to try the purchased ones. They are not very expensive.
Please log in or create a free account to comment.How do you know that they are expired or that you need to toss and make more?
Please log in or create a free account to comment.If it’s starting to take longer for the loads to dry, you might need new ones :-)
Please log in or create a free account to comment.Is there anything like these yarn balls that I can buy?
Please log in or create a free account to comment.Absolutely! Just click on the underlined words “wool dryer balls on Amazon” in this post :-)
Please log in or create a free account to comment.Thank you! I am using up the last of a HUGE box of dryer sheets, and don’t want to buy more, what I hear/read about all the chemicals makes me wary. I will be making these!! Followed you for years, Thanks!!
Please log in or create a free account to comment.Please explain FELTING. Thanks.
Please log in or create a free account to comment.When the woolen ball gets wet and then dries, the wool bonds to itself. This makes the ball more unlikely to unravel. Think of a piece of crafting felt material. I usually throw the woolen balls in a wash load once or twice a year. I had read that the use of wool yarn vs all other yarns is its drying and static control. Fun and relaxing project!
Please log in or create a free account to comment.I roll up a pair of socks and tie them in a nylon (5). They have bounced around for 4 years and still work. No extra lint. Faster drying time. Much cheaper than buying wool. Less time to make. No worry about aluminum from foil balls (worries about brain damage), that also work. Quieter in operation. No static cling in Chicago. Cheaper than purchased wool balls of DIY felted or plastic balls. People even worry about bouncing tennis balls due to lead??? Truly a set it and forget it.
Please log in or create a free account to comment.U R silly!
Do you use regular socks or must they be wool?
When wool is exposed to hot water, it “felts,” or fuses together. If you’ve ever accidentally washed a wool sweater on hot water, you’ve seen that it shrinks and the fibers pull together really tightly. That’s exactly what’s happening here!
Please log in or create a free account to comment.That’s good to know about the super wool. One of these days I might have to try this. I just use the generic unscented ones. It’s mainly because of my tight budget.
Please log in or create a free account to comment.I have felted ones that were given to me and I love them. So nice that you offer instructions for a DIY!
Please log in or create a free account to comment.I have a big bag of non-wool balls of yarn. I could use them, and even tie them up in an old stocking leg. No need to felt. That should work just fine. Wool balls probably won’t sound as loud or clunky as the big dryer balls that I already have.
Please log in or create a free account to comment.Non wool balls will not work for this project, they won’t felt or absorb moisture from your damp clothing. Wool dryer balls are not noticeably loud, not like tennis balls. I make my own balls very tight and heavy, because that gets the best results, and I don’t notice any additional noise.
Please log in or create a free account to comment.I read that those dryer balls (not these wool balls) can damage your dryer. Do these? Are they as hard and as loud in your dryer. Don’t want to damage my dryer drum.
Please log in or create a free account to comment.They do not damage your dryer at all. They are wonderful. Use them all the time
Please log in or create a free account to comment.They’re a little louder than your usually load, but it’s not too bad! They are definitely not bad for you dryer :-)
Please log in or create a free account to comment.How did you finish the yarn end so it is secure? Did you just tie it to a strand?
Please log in or create a free account to comment.Nope, just tuck it under the other strands :-) It will felt together in the nylon stage, so it’s not too important.
Please log in or create a free account to comment.Thanks for the tip! I haven’t done any needle work in years, so that’s something to know when shopping for yarns…
Please log in or create a free account to comment.This is brilliant, tried it, loved it, no more lifeless clothes
Please log in or create a free account to comment.Be careful NOT to choose a wool marked
Please log in or create a free account to comment.“Superwash”. This has been specially treated not to shrink or felt, making it good for items like socks or children’s clothes (They don’t need hand washing)
Thanks for the tip!
Please log in or create a free account to comment.Is there any other option for those of us that are allergic to wool? A different type of yarn perhaps? Just Curious
Please log in or create a free account to comment.You could try something like this: http://amzn.to/2nbETwo
Please log in or create a free account to comment.Start saving your worn out socks – stuff three or four into another and tie – should work about the same – you can still add a few drops of essential oil and/or fabric softener if you like.
Please log in or create a free account to comment.You can also throw in a small hand towel or washcloth..They speed up drying…Have a great day, all of you readers!!!
Do u also wash your clothes with a towel?
Very excited on this post–I have been using dryer balls from Amazon and really like them but excited to try my own. Thanks for sharing. One question though on felting…Do you felt more than once?
Please log in or create a free account to comment.NO. Heat and moisture and friction are what make wool into felt. You only need to do this once.
Please log in or create a free account to comment.Just the once!
Please log in or create a free account to comment.