


The Christmas before last, I got my son-in-law Neil the sous vide cooker he had included on his wish list. (He’s a chef, so it’s typical for his lists to be full of kitchen equipment.) Normally I’m no stranger to kitchen gizmos and gadgets, but I bought the sous vide cooker online knowing next to nothing about what it did or how it worked!
But since that Christmas, I’ve learned quite a bit about sous vide cooking, both from Neil and from attempting my own experiments at home! And part of what I’ve learned is that sous vide cooking has a lot to offer any home cook! And in today’s post, I’ll be offering a little introduction to the world of sous vide cooking, and sharing with you what exactly I love about it! :-)
Related: The 11 Most Devastating Mistakes You Can Make With Steak
What Is Sous Vide? / What Does It Mean?
In French, “sous vide” simply means “under vacuum.” But in the culinary world, sous vide refers to a cooking method where the heat from a water bath is used to cook vacuum-sealed foods.
It may sound complicated, but with the right equipment, it’s actually one of the easiest and most accurate cooking methods out there! Because you can control the heat so precisely, it takes the guesswork out of cooking meat, fish, eggs, and so much more. (Later in this post, I’ll show you how to use the sous vide method to cook perfect steaks every single time—really!)
Related: The One Chef’s Secret You Need to Know If You Love Steak
The 2 Things You Need for Sous Vide Cooking (+ 2 Optional Things)
While sous vide cooking can be as simple as tossing a sealed bag of food into an insulated container of hot water, it’s easier to do if you have a few good pieces of equipment. Here’s what you need to get started:
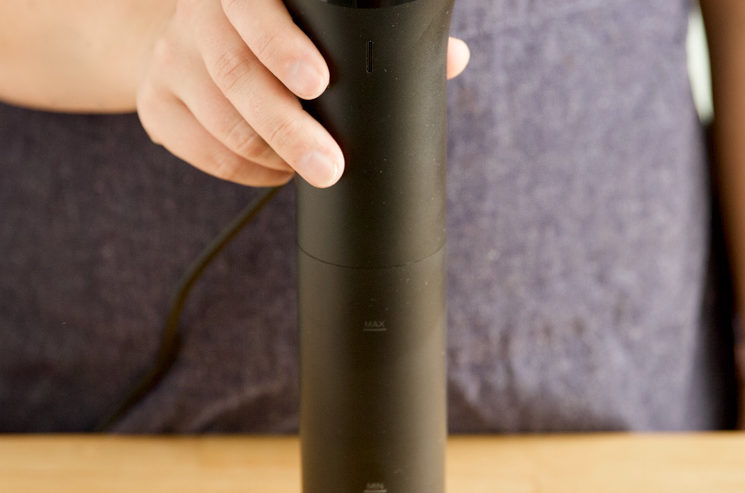
#1 – Immersion Circulator
An immersion circulator heats up and circulates water for sous vide cooking. While circulators used to be quite expensive and hard to find, there are now a lot of affordable options for home use! I have the Anova Nano, which I love and would recommend to anyone interested in sous vide cooking!
Other affordable options include the Instant Pot immersion circulator and the Wancle sous vide cooker. The Joule is a popular option too, but it’s also quite a bit more expensive.

#2 – Large Container
Next, you’ll need a large container (which is where the cooking will take place). If you have a large pot, that will work just fine! Just clip, clamp, or attach your circulator to the pot, fill it up with water, and you’ll be ready to cook.
Another option is to use a large, durable container, like those made by Rubbermaid and Cambro. One advantage of using a container instead of a pot is that you can find lids for these containers that are designed to fit your specific sous vide cooker. I bought this lid for my Anova Nano that fits perfectly on my 12-qt. Rubbermaid container.
Technically you don’t need to put a lid on your pot or container during the cooking process. Having a lid just helps cut down on water evaporation, meaning you won’t have to add more water to the container during longer cooks.
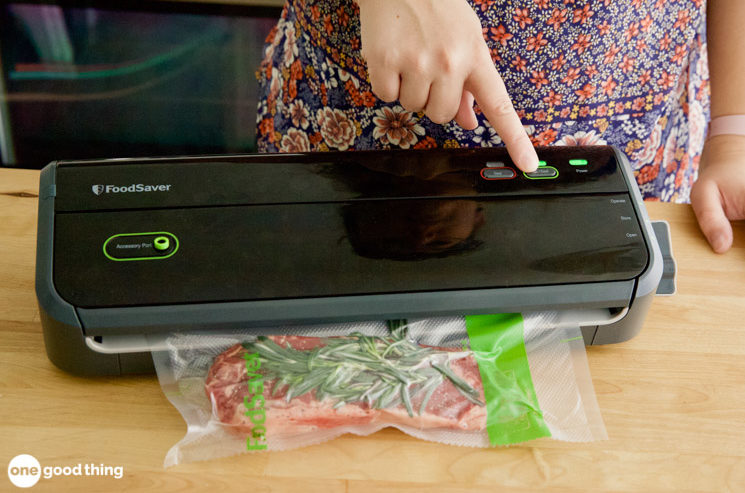
#3 – Vacuum Sealer (Optional)
While food does have to be vacuum sealed for sous vide cooking, it’s not absolutely necessary to have a vacuum sealer to do it. That being said, having a vacuum sealer at home is extremely useful, both for sous vide cooking and much more! (You can read more about my love for vacuum sealing at the link below.)
Related: Want to Save on Food? This Is the One Kitchen Gadget You Need
More Ideas You'll Love

Another option for vacuum sealing your food for sous vide cooking is to use sous vide bags with a hand pump. You can also use regular ziplock freezer bags if you want. Just put your food in the bag with the top open, slowly lower the bottom part of the bag into water to remove the air, then zip it closed.
#4 – Cast Iron Pan (Optional)
Sous vide cooking gives you complete control over the final temperature of your favorite cuts of meat, but it can’t replicate the delicious effects of a good, hard sear in a hot pan. That’s where having a cast iron pan comes in handy! Searing your meat on a hot cast iron pan after cooking is the secret to achieving peak deliciousness. (You can also finish them off on the grill, it’s that’s more your style.)
Now that we’re all a bit more familiar with what sous vide cooking is and how it works, it’s time to see it in action! Here’s how to cook a perfect steak using the sous vide cooking method.
How to Cook the Perfect Sous Vide Steak
Step 1 – Start Your Water Bath
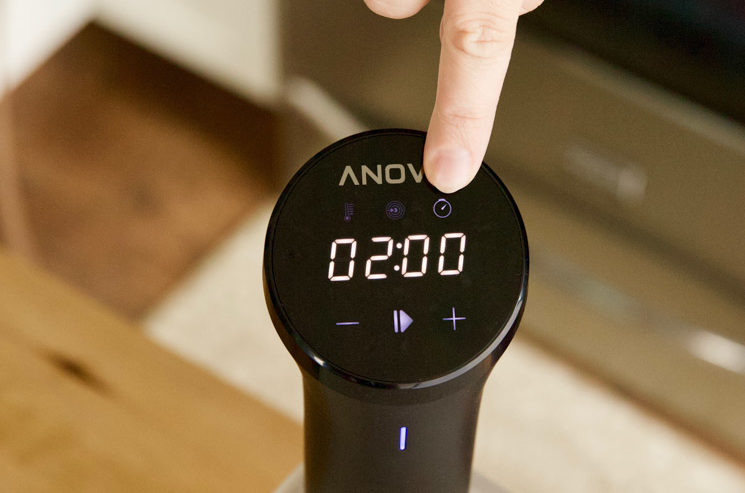
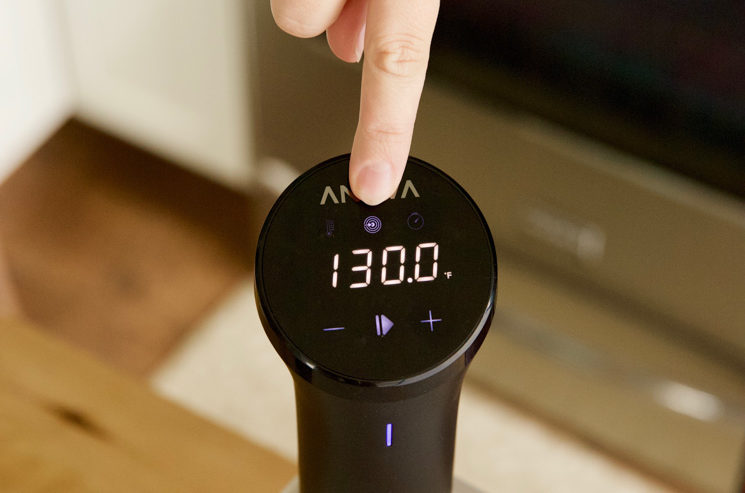
Fill your preferred container with water and insert your immersion circulator. Most circulators are easy to use (and many even come with a handy app you can use to control it from your smartphone!)
Set the time and temperature according to what type of steak you’re making and how “done” you want it to be. Here, I set my circulator at 130°F to cook a perfect, medium-rare New York strip steak.
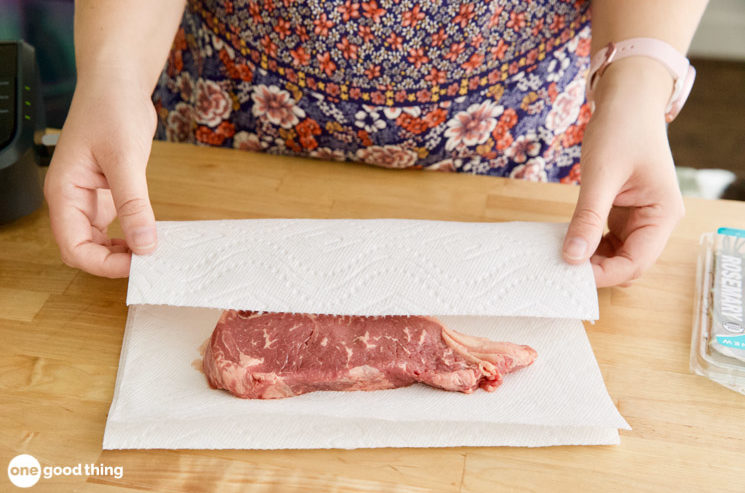
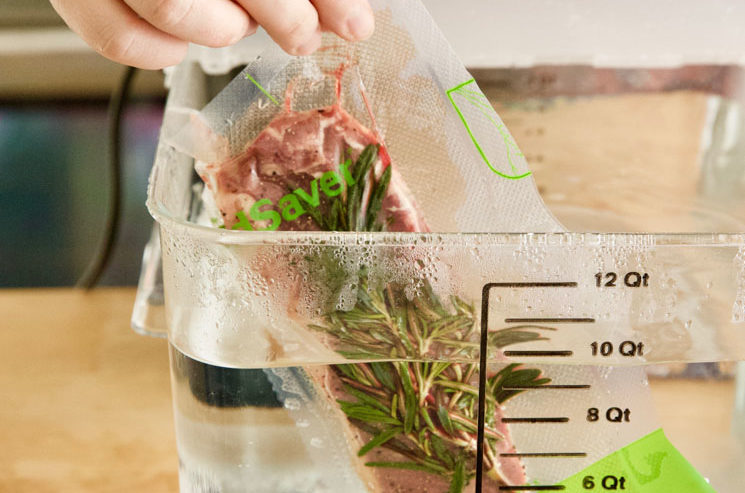
Step 2 – Prep Your Steaks
Dry your steaks with a paper towel, then season both sides with salt and pepper. Place the seasoned steaks in a bag with a few sprigs of fresh thyme and/or rosemary for extra flavor. (Note: If you’re freezing steaks to cook later, don’t add salt until after you’ve cooked them. Salting before freezing can add a “cured” taste and change the texture, so it’s best to avoid it.)
Remove as much of the air from the bag as you can and seal it tightly.
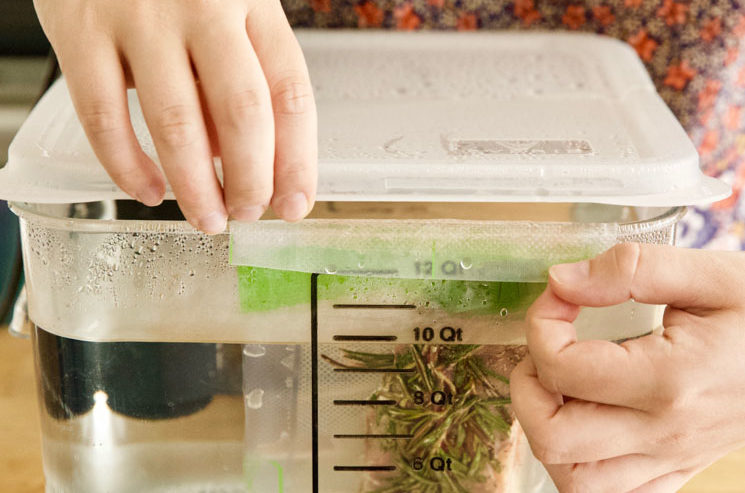
Step 3 – Cook
Place the bag into the water and cook at the recommended time and temperature for your particular steak. Take a look at these helpful charts at Serious Eats for time and temperature recommendations.
I set my circulator to cook my New York strip at 130°F for 2 hours. (Timing is more flexible with sous vide cooking, so I could have cooked it for slightly more or less time with the same results.)
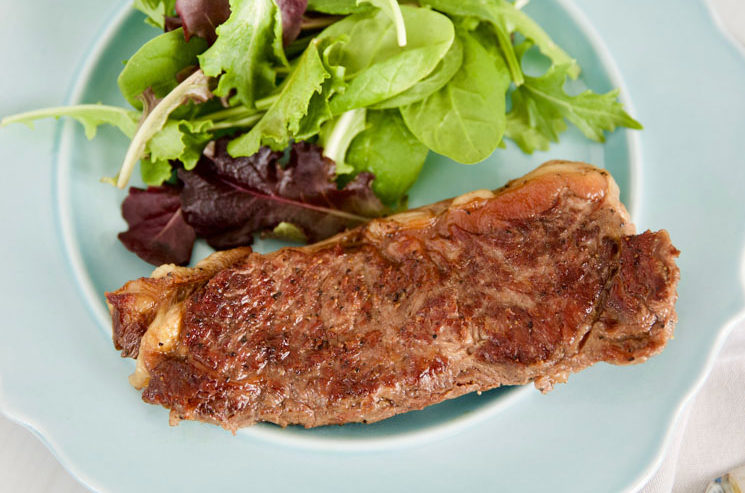
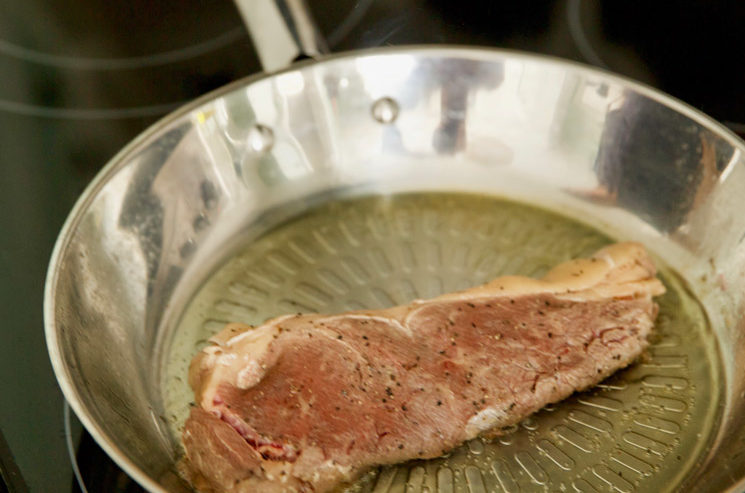
Step 4 – Sear & Eat!
Put a bit of oil into a cast iron pan, then place the pan on your stove over medium-high heat. Wait until the oil is shimmering, then place your cooked steak in the pan. Sear for about 30 seconds on each side, then let your steak rest for about 5 minutes.
More Ideas You'll Love

Finally, dig in and enjoy your delicious, perfectly cooked steak! :-)
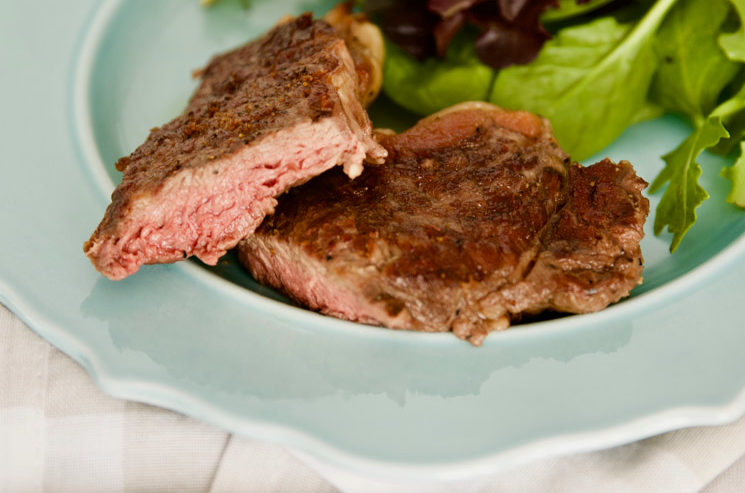
I’m a relative newbie when it comes to sous vide cooking, but I’ve really been enjoying it so far! It’s so nice to not worry about my steaks being overcooked or undercooked. With sous vide cooking, I know they’ll come out exactly the way I want them to every time!
Hopefully this post helps pique your interest in sous vide cooking too. And stay tuned, since I’ll likely be sharing more of my sous vide experiments in the future! :-)
Have you ever tried sous vide cooking at home?


While I always enjoy learning about new methods of cooking, what with today’s concerns about micro-plastics in virtually everything (including our bodies), do you know if anyone has studied the consequences of this method?
Please log in or create a free account to comment.Rose_Anne, Studies are still being done regarding this risk. If you are concerned, I would suggest you use food-grade, BPA-free bags and/or consider alternatives like silicone bags or other cooking methods to minimize potential risks.
Please log in or create a free account to comment.You can accomplish the exact same thing if you already own a really good cooler. Sounds weird, I know. They are really good at keeping things cold but they are also good at keeping things warm. The idea here is to get your steak to about 115-125 degrees. When that’s done, throw it on a stove or skillet to finish cooking to your liking. Also, a bonus of using a sealer bag is that you can marinade overnight and throw it in the cooler when you’re ready. Use the leftover marinade and the beef juices to make a pan sauce.
Please log in or create a free account to comment.Back in the 70’s this was called “Boil in the bag”.
Please log in or create a free account to comment.It’s on sale right now at Costco. The cooker thingy and the tub.
Please log in or create a free account to comment.What type of grill pan do you have. Can’t find anything like it.
Please log in or create a free account to comment.Hi Joni! In the photos, I am using this exact pan: https://amzn.to/2Xok5Co
It’s stainless steel, which works pretty well! But I would recommend a cast iron pan instead – nothing can beat cast iron! I love the stainless steel pan for its versatility, though. :-)
Please log in or create a free account to comment.My son is the foodie that requested a sous vide for Christmas. When he cooked for us we realized he was onto a great thing.
I make yogurt with mine. I’m sure I’m not utilizing it to its full potential. Thank you for all the links and detailed instructions Jillee. You give the greatest tutorials. Your website is one of the most useful put there.
Please log in or create a free account to comment.I haven’t pulled the trigger on a sous vide circulator yet, but I came up with the “poor man’s/cheapskate’s” version. I season the steak or whatever I’m cooking, wrap it in foil, and put it in my toaster oven at the 150F “keep warm” setting with a probe thermometer in it. When the food reaches my desired temp (for steak I prefer 110F – I don’t know anyone except for health inspectors who consider 130F+ medium rare) I sear it in a hot pan. Yeah, the surface dries out a little, which wouldn’t happen with sous vide, but you’re going to sear it anyway, so the end result is indistinguishable.
Keep in mind, this is only cheaper than sous vide because I already owned all the necessary equipment.
Please log in or create a free account to comment.This looks delicious, I’ll admit I’m a fan of steak on the grill, but this looks like it’s worth a shot, great post!
Please log in or create a free account to comment.“Technically you don’t need to put a lid on your pot or container during the cooking process. Having a lid just helps cut down on water evaporation, meaning you won’t have to add more water to the container during longer cooks.”
Jillee, I kept watching to see how you place the lid on your container with the Annova in there, and in the picture where I might have been able to see that, your hand was blocking the view of it. How do you do it?
Please log in or create a free account to comment.I actually have a special lid – it has a hinge on it so the immersion circulator stays in the water while I open the other end. In the section “#2: Large Container,” just click on the underlined words “this lid” to see some more clear pictures :-)
Please log in or create a free account to comment.I love kitchen gadgets and recently downsized somewhat. The best thing I ever bought was the Instant Pot and have a large and small. Can’t live without them. At first I was fearful and things seemed complicated but after a few times, so easy and love the food I make. I am very happy you mentioned this “new to me” form of cooking and I will check it out. The other kitchen gadget that I love is the immersion blender. When I make soup in the Instant Pot, I just stick that in there to chop up vegetables for a cream of broccoli/cauliflower soup. There are recipes that say to take your hot soup and pour it into the blender to chop it up, which I did a few times, and it was a dangerous and hot mess. Stick the immersion blender in the Instant Pot and you are done; greatest thing ever (besides the Instant Pot). Thanks for the info!
Please log in or create a free account to comment.We’ve been cooking Sous Vide for years. My husband 1st started with a bucket heater and a cooler. So much easier with the Anova. We cook anything with meat this way. Even soups if they have meat. The meat is always cooked the way you like and never dries out. Try shrimp won’t be over cooked.
Please log in or create a free account to comment.https://www.bonappetit.com/story/how-to-sous-vide-anything
Please log in or create a free account to comment.I had no idea how this process worked even though I’ve seen it mentioned a lot in various articles. Thank you for your very clear explanation of Sous vide cooking. Keep up the good work.
Please log in or create a free account to comment.I just added “Immersion Circulator” to my “things I want” list! Any time my husband asks what I want (for my birthday or holiday) I look at this list! Can’t wait to try this method and “set it and forget it”!!
That’s my favorite way cook! Lol
Thanks for the new idea and great tips!
Please log in or create a free account to comment.We started cooking with a sous vide this year and it is so easy. I marinate chicken breasts when I but then, throw them in the freezer and cook them in the bag while they still frozen if I forget to the them. I’ve never enjoyed chicken breast because it’s usually dry but this method is perfect. Pork chops are great too. It’s a bit pricey but it is easy and delicious.
Please log in or create a free account to comment.Thank you! I have been wondering about sous vide cooking for quite some time now. Thank you for laying out all of the steps for doing this! I was stymied before!
Please log in or create a free account to comment.People, it’s not just for steaks. It makes the juiciest chicken breast, venison (which is notoriously dry) and all kinds of food. The Anova website has lots of recipes. I make bread pudding breakfast custard in mason jars, 12 at a time. They last two weeks (unopend) in the fridge. Just pull one out and microwave for one minute. The 30 or so minutes of time I invest means I don’t have to worry about breakfast for over a week
Please log in or create a free account to comment.Do you mind sharing your recipe? It sounds delicious!
Please log in or create a free account to comment.I understand, from my brother-in-law , that one of the great things about sous vide cooking is that you can make a cheap steak taste as good and tender as an expensive one. I haven’t tried it yet, but would love to.
Please log in or create a free account to comment.Temperature equals doneness and time equals tenderness. Think of this article as an introduction to an introduction. It sounds complicated, but it really is the most forgiving of all cooking methods. Circulators are now really affordable and take up almost no space when not in use. The the amount and quality of information available on line is incredible. Certainly worth a look.
Please log in or create a free account to comment.Looks good in the end but too complicated. Who wants go through all that ? Marinate a few hours in a mixture of worcestshire sauce, a drop of soy, barbecue sauce and brown sugar mixture. Cast iron pan does the rest.
Please log in or create a free account to comment.Good recipe for ruining a good steak.
Please log in or create a free account to comment.Quite unhealthy! Tons of salt and sugar!
Please log in or create a free account to comment.Can you walk away from your cooking cast iron pan? You can with a Sous Vide cooler. Cast iron pan burns away juices, sous Vide cooks in the meat juices. I use a Searzall torch for the searing because it is more controllable than a pan.
Please log in or create a free account to comment.Seems like a pretty expensive way to cook a steak. Stick with the cast iron pan and fewer gadgets.
Please log in or create a free account to comment.You can make quite a few other things with this method, but if you don’t want to do it, fine. You don’t need to complain about it and try to make Jillee feel dumb
Please log in or create a free account to comment.Irene is entitled to her opinion, and she’s spot on. This sous vide is simple yet another expensive gadget that will clutter up the kitchen. A cast iron pan is one of the most useful items a cook can have, and with proper use will last several life times.
You can get a good immersion circulator for under $80. It takes up about the same amount of space a good rolling pin. It allows you to try out a whole range of dishes without the worry of over/undercooking. Its also very good where you might not be able to eat when you meant to. Roast in the oven supposed to be ready at 3. If you arent ready, too bad they roast is. Not its starting to overcook and dry out. In sous vide its held at that specific temp. It wont go over. If you dont get home till 3:45, it will be just as ready.
Obviously you are entitled to your opinions also. You are incredibly correct with your take on cast iron pans. Your SV take, not so much. When not in use my circulator takes up about as much space as a rolling pin.
I purchased my sous vide stick at Aldi for 39 bucks. A couple of weeks later it was on sale for $29. Doesn’t have to be that costly.
Thanks for info on the sous vide. My son and daughter-in-law bought one for my birthday. The only thing I have made so far is steak and it was really tender. Just need some more ideas.
Please log in or create a free account to comment.Pork chops are terrific! The only way I cook them now.
Please log in or create a free account to comment.And pork tenderloin is juicy and done perfectly!
Please log in or create a free account to comment.Are we sure that cooking in plastic is safe?
Please log in or create a free account to comment.You can purchase resealable reusable silicone bags to use with sous vide.
Please log in or create a free account to comment.Yes – all the bags are BPA-free and made for cooking :-)
Please log in or create a free account to comment.Ugh – no more gadgets for this lady
Please log in or create a free account to comment.I, too, am a gadget queen who is paring down on the kitchen clutter. As for the issue of storage for the S.V. vs cast iron pan (which I love), it takes up less space than any of my cast iron cookware. I did invest in a few silicone bags for my sous vide cooking to avoid the issue of plastic. I’m afraid I don’t trust anyone’s claim that cooking in ANY plastic is safe. And who knows if there won’t be long-term issues with silicone, but for now it’s my favorite choice. I haven’t cooked anything sous vide yet, it’s still brand new, but I’m looking forward to this adventure.
Please log in or create a free account to comment.