


Stove burners and stove burner pans are some of the most vexing things to clean in any kitchen. They are prone to both food spills AND high heats, which results in baked-on messes that are seemingly impossible to remove.
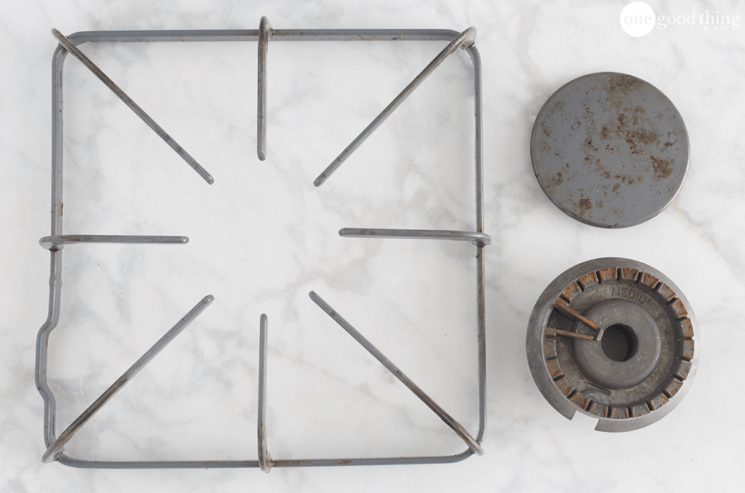
Before I got a nice, new gas stove a couple of years ago, I had a clunky old electrical range that suffered from the same issues I mentioned above. I eventually just started buying cheap packs of replacement stove burner pans at Walmart, because I could not for the life of me find an effective way to clean them. But once I got a nice new gas range, I knew I’d have to figure out how to get those parts clean, since they aren’t as easily replaceable as the burner pans had been. That’s when I discovered the ammonia method that I’ll be showing you today!
Using this method, I am able to clean all the removable parts of my stove without any serious scrubbing. It’s super simple, and I use it a couple of times a year to keep my stove looking clean and sparkly! For those of you who haven’t tried this method yet, you simply MUST. Period. One of the best tips I’ve ever come across on Pinterest, and that’s saying a LOT!
How to Clean Your Stove Burners
You’ll need:
- Stove burner parts
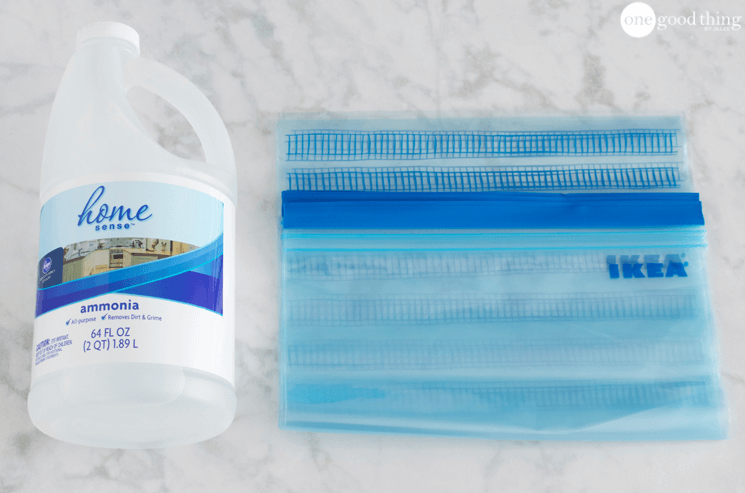
- Gallon-sized ziplock bags
- Ammonia
Directions:
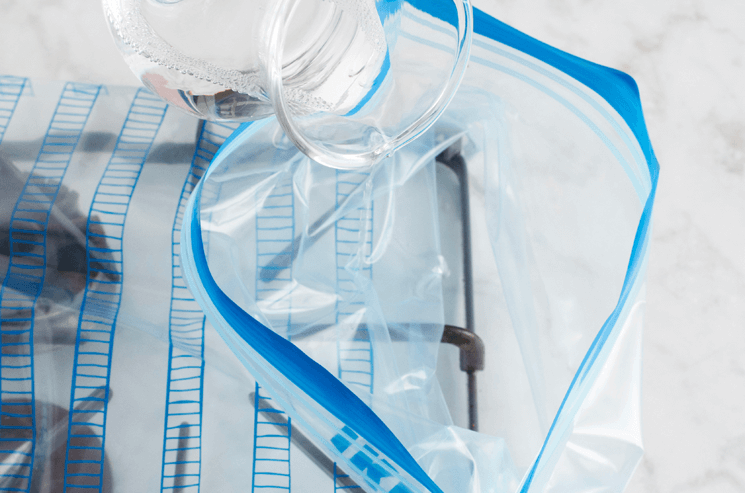
Pour a splash of ammonia into a ziplock bag. Then place one of your stove parts into the bag and seal it, and repeat until all the parts you want to clean are sealed up in bags. (You can put between a few parts in the same bag if there’s enough space.)
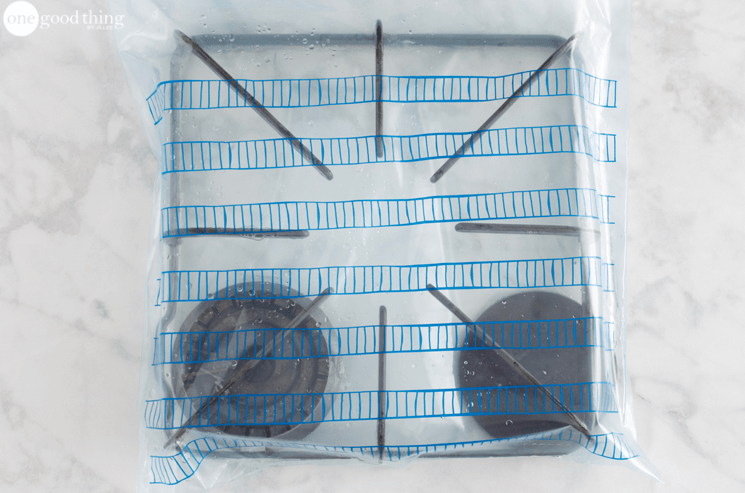
Leave the bags on your countertop overnight.
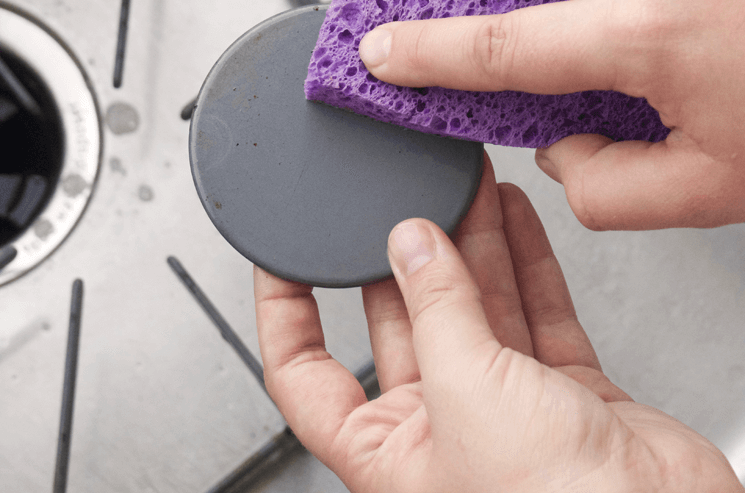
In the morning, pull the parts out of the bag and use a soapy sponge to wipe away the grease and grime. (You might want to use rubber gloves for this part!)
If there are a few extra stubborn stubborn spots of grime, tackle them with a paste of baking soda and hydrogen peroxide and a little elbow grease. The baking soda/peroxide paste can also help polish the shinier parts and leave them looking sparkling clean.
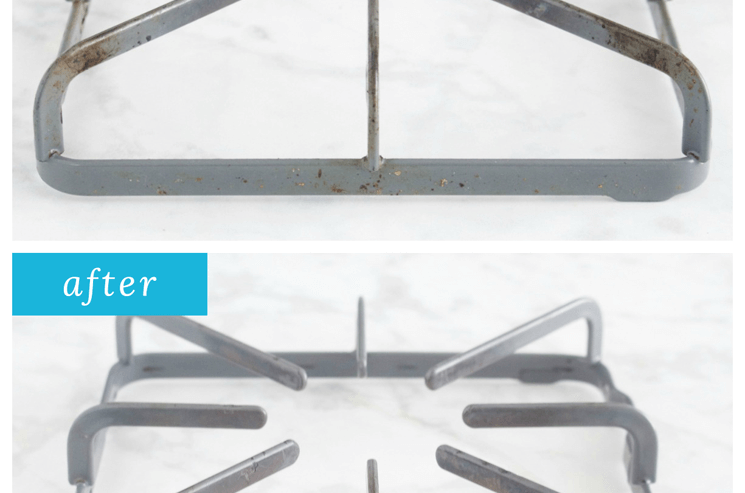

I think the before-and-after pictures speak for themselves!

The only part that didn’t come quite as clean as I would have liked was the burner base. But as you can see in the before photo, the part was a little rusty already, so I think that contributed to it not coming as clean as the other parts. I’ll have to use something a bit tougher on that piece, but otherwise everything looked marvelous!
I was highly skeptical of this method before I tried it, but I’m so glad I did! Now it’s your turn! :-)
NEW! Can you guess the 5-letter word related to today’s post?
More Ideas You'll Love






I’m a bit late to this party BUT, my burner grates on my gas stove are 20+ inches long!!!! In other words, it’s all one long grate that covers two burners — and I have four burners and one long one in the middle for a griddle. So that makes 3 grates almost two feet long each. If if wanted to try the ammonia trick I suppose I could try to find some gigantic disposable plastic bags somewhere — got any ideas?
So what I did was stack them on top of each other (staggered of course) in the bottom of my shower and just spray the heck outta them with Dawn Powerwash and let them soak for a bit. Then I had to scrub them down (a long-handled bbq grill brush would have come in handy) and rinse them off while they were still in the bottom of the shower. Let’s see… knees, back, fingers… oh my!
Anybody got a better, less painful way to clean these monster grates?????
~Deb~
Please log in or create a free account to comment.I need to know how to clean the white enamel of my stovetop. It has tough cooked on food that I can’t remove at this point. I am afraid of ruining the enamel if I use steel wool or other kinds of harsh cleaners. Please let me know if there is any way to do this.
Please log in or create a free account to comment.I’m VERY excited to try this method. When we moved I inherited quite an old electric stove. I have never been able to get the burners clean but I’m loath to replace it because it works great. I’m now confident that I will get the whole stove looking (retro but) brand new. Thanks Jillie! I can’t tell you how much useful information you have given to me from various posts! You’re the best thing I found on the internet!!!!
Please log in or create a free account to comment.You can also clean your cookie sheets (as long as they are not non stick) in a xl large zip lock bag with a splash of ammonia leave it outside overnight and then just wash with soap and water. No scrubbing!
Please log in or create a free account to comment.Thank you Jillee! The stuck-on grime that touched the ammonia flaked right off after I took it out of the bag but the parts that didn’t have some really tough grime left on them. I think next time I’m going to fill up a bucket and soak them that way to ensure everything is submerged.
Please log in or create a free account to comment.All I can say is…WOW! Just bought a Mid-Century house, the stove is really awesome and would be amazing if I could clean the burners. So, I cleaned one burner, just to test this method.
Please log in or create a free account to comment.Do it!!!!! You will be so pleased!!!
Im throughly CONVINCED whoever made those burner bases, burners & the burner tops never cleans their stove!! Anyone else feel this? My stove, windows, shower tracks, behind the fridge & toaster are a few items I swear were made by men[sorry guys] or those who never clean lol
Please log in or create a free account to comment.I wish I would have known this about my new stove as my grates & burner tops are cast iron, which I thought would be easy to clean. The burner bases kill my fingers with scrapes & nicks trying to get in between the nooks & crannies- so frustrating! Using Mr Clean erasers while it works great on some areas,but gets disinegrated by the top(which is also where my hands get chewed up) Ive also used a wire brush which again does well in some areas but the one I have is a but too big. I am gonna for sure try your idea! Plus its much easier!
Can I use this solution directly it in the oven by spraying it all around to clean the inside of the oven
Please log in or create a free account to comment.Try this, instead: http://jillee.co/2v2llkB :-)
Please log in or create a free account to comment.could you put a dish of ammonia in the oven overnight and get the same results?
Please log in or create a free account to comment.Yes! Here’s a post all about it: http://jillee.co/2v2llkB
Please log in or create a free account to comment.Can I use this method for the electric burners?
Please log in or create a free account to comment.Yes!
Please log in or create a free account to comment.Can I clean my electric stove burner rings and the drip pans? Thanks
Please log in or create a free account to comment.Yes!
Please log in or create a free account to comment.In your directions, when you say a “splash” of ammonia, it looks like you are pouring in enough to cover the items. Am I correct or just a splash will give off fumes, as well, to work the crud off?? Thanks, Jillee!
Please log in or create a free account to comment.It’s just a splash – you don’t need to cover the items! :-)
Please log in or create a free account to comment.I have been using this method for years. I do not put the ammonia directly in the bag. I put all the parts in a garbage bag and then put the ammonia in a can inside the bag and tie the bag up over night. In the morning dump the ammonia out and wash the stove parts.
I’m currently cleaning my oven using the ammonia and hot water method that you blogged about, am I able to clean the stove top pieces at the same time using the ammonia and freezer bag method? Or will it leave the oven too wide open?
Please log in or create a free account to comment.You can do them at the same time!
Please log in or create a free account to comment.I read this method of cleaning the parts to the gas stove numerous times and was really skeptical. This past weekend, I gave it a try. Keep in mind that my stove parts were hideous in comparison to the ones displayed here. Anyway, I added each burner parts into it’s own ziploc bag, I poured about 1/2 cup (or less, not good with math) of ammonia and sat each bag in the sink. I sat them in the sink instead of on the counter in fear that the bags would explode overnight spilling the noxious ammonia all over my counter. In the morning when I opened the first bag, I was amazed visually at how much of the gunk was off of the parts. It took a little soap and water to clean off the rest. My stove parts now look like new again. I am truly amazed and am no longer a skeptic! You must try for yourself.
Please log in or create a free account to comment.It’s amazing, isn’t it! :-)
Please log in or create a free account to comment.Handy hint for gas cooktops – if you find you get a thin layer of burnt on brown gunk around the gas elements, even though nothing has been spilt, it’s because your pot is too close to the burner. Not sure what that stuff is (some sort of burnt on gas residue?), but it’s sure hard to get off!
Please log in or create a free account to comment.Anyhoo, the answer is to use a wok holder or similar to lift the pot a bit higher up away from the flame and let more air circulate (I usually add a simmer mat as well to help disperse heat more evenly), so that the residue isn’t deposited in the first place. It doesn’t seem to affect the cooking time, and saves a lot of time, effort and cursing when it comes to cleaning :-)
This is the easiest and most effective method so have ever used!! If you are skeptical like so was, give it a try and you will be a believer like myself!
Please log in or create a free account to comment.Tried this 2 years ago and have never done anything different since. It’s the most magical thing ever! My only added tip is too make sure you keep your face well away from that bag when you open it! I’d also open them outside!!!
Please log in or create a free account to comment.I have used this method for years, a friends mom told me about it. We put the parts in a large garbage bag and this is outside. Then we leave it in the sun all day with shinning down on that hot black bag. Have used this also to clean racks in the oven or any other thing that’s in my oven that needs cleaning and can easily be removed.
Please log in or create a free account to comment.This idea totally works. I have been doing it ever since. Make sure you use a well ventilated area because of the ammonia Fumes. The junk just slides right off.
Please log in or create a free account to comment.Do the parts need to be completely covered by the ammonia?
Please log in or create a free account to comment.No. The fumes do most of the work. :-)
Please log in or create a free account to comment.Last week I used the Hydrogen Peroxide with baking soda on two burner pans [under the electric elements pans], that were quite black-brown with burned on I don’t know what—it took about 1.5 days, and I repeatedly sprayed H3O on the paste, but it took off bout 95% of the gookygoop. WOW I was impressed. Had I been more enterprising and knew how to use my iPHone cam, I would have liked to post before and afters, though not sure that is possible…
Thanks Jillee for your tips. I’m currently decocting lemons and vinegar to make cleaner and I’m going Green, Bebes….already use sprayed vinegar and H3O in my toilet and it works great. —Stevie de Longmont CO
Please log in or create a free account to comment.Can the electric coils be cleaned this way if I don’t ‘wet’ the connection prongs?
Please log in or create a free account to comment.Yes :-)
Please log in or create a free account to comment.Can this also work on aa very nasty iron skillet, it is a family skillet don’t want to ruin it but it’s so gunked up, sticky outside.
Please log in or create a free account to comment.A great way to clean a cast iron skillet is in a hot fire. We put our in the wood burning stove once each winter. It burns off all the nastys. You just have to re-season the skillet afterwards.
Please log in or create a free account to comment.Any help on how to get melted plastic (a bread bag) off of a burner? I managed to turn the wong burner on… And no, I can’t just turn the burner on and burn the plastic off, with all the fumes it will put into the air. Help!!!
Please log in or create a free account to comment.Scrape off as much as you can, and then try the method in this post – the ammonia should do the trick! :-)
Please log in or create a free account to comment.Any other ideas? I have a hard time believing that the ammonia will do anything to the melted (not burnt) plastic on the burner, since it doesn’t “eat” the plastic bag that the burner is put in. I have tried scraping it off–no luck. I’m going to try again–putting it in the noon sun to get it very warm (Actually, quite hot, I’m in Phoenix) on top of a paper sack, scraping what I can off, and then when cooler, attacking it with a rough plastic scrubber and baking soda. I’ll try to remember to let you know how it turns out…
Does anyone kow if it is okay to use steel wool on an electric burner?
One other trick is just to put them in the oven when you run the self-cleaning setting. It also gets rid of every bit of gunk on all of those parts, and doesn’t leave your house smelling like ammonia!
Please log in or create a free account to comment.I use this method, works really well.
Please log in or create a free account to comment.