


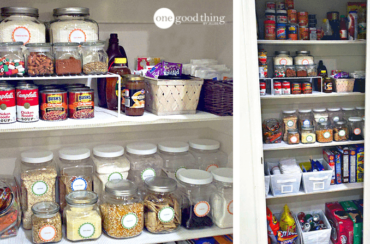
I really like using glass containers to store dry ingredients and other pantry staples, but it does help to add clear labels so you don’t have to guess what’s inside. As long as you have an inkjet printer, you can make them using printable label sheets you can find at most office supply stores, but there’s another option that’s quite a bit cheaper!
Related: 9 Simple Ways to Conquer Clutter in Your Kitchen
A more affordable alternative is to make your own clear labels using your printer and some packing tape. I was skeptical about this idea at first, but it works surprisingly well and they’re simple to make too!
Aside from saving you money, the other advantage of making these packing tape labels is that you get total control over what the labels say and what they look like. Use your favorite font in whatever size will fit your containers best!
Author’s Note: I ultimately decided against making a set of downloadable labels for this post because I have no way of knowing what you’re labeling, what size your labels ought to be, or even what fonts you like. With all those unknowns, I figured the smartest solution was to leave those decisions up to you!

How to Make DIY Clear Labels with Packing Tape
You’ll need:
- Heavy-duty packing tape
- Scissors
- Inkjet printer
- Paper
- Craft stick or other sturdy object with a flat edge

Directions:
Step 1 – Make and Print Your Design
Start by creating your labels and printing them out — you can make them in Microsoft Word, Google Docs, or whatever word processor you like best. (Tip: To make 4 labels per page as shown above, set your page orientation to landscape, insert a 2×2 table, and set the borders to 0 px or make them transparent.)
For best results, choose a bold or thick font and print your design in black or grayscale, as thin fonts and colored ink don’t usually transfer as well.
Step 2 – Tape Over the Design
Carefully cover the printed area with a piece (or pieces) of heavy-duty packing tape.

Step 3 – Press the Ink and Cut the Labels
Use a craft stick (or whatever you can find that’s sturdy and has a flat edge) and rub it firmly over the printed areas to ensure a solid bond between the ink and tape. Don’t be afraid to use some elbow grease here, because more pressure will make for clearer labels.

Use scissors to cut your labels down to your desired size.

Step 4 – Soak the Labels
Next, fill a wide, shallow bowl with warm water and put the label(s) in to soak. Leave them there for 20 minutes to an hour, or until the paper separates easily from the tape.

Step 5 – Remove the Paper and Let the Tape Dry
After soaking, remove the labels from the water and carefully peel the paper away from the tape. Set the wet labels on a towel with the sticky side facing up, and allow them to dry for a few minutes (or until the adhesive becomes sticky again).
More Ideas You'll Love


Step 6 – Apply Your Finished Labels
Finally, apply your finished clear labels as desired — they look great on glass, but you can also apply them to wood or plastic.
I love how these clear labels look on the big glass jars we have in the kitchen at the OGT Studio, and the fact that it didn’t cost us a thing to make them is the icing on the cake! How’s that for frugal organization?
How do you label your containers?
NEW! Can you guess the 5-letter word related to today’s post?
More Ideas You'll Love






This is such an awesome idea! I have hunted all over for labels that will actually fit snugly on my curved spice jars. I haven’t found anything that will curve around the glass. This is just PERFECT! Thank you!
Please log in or create a free account to comment.This is great! I always store stuff in clear glass containers and I’ve used a silver metallic sharpie to write on the glass (it is removable with rubbing alcohol). As a celiac, all my flour replacement ingredients, and blends, look the same. I’m going to try this, thanks Jillee.
Please log in or create a free account to comment.Just what I was looking for! I was contemplating buying those transparent inkjet labels until I read the reviews from users complaining about the ink smearing and smudging off. Brilliant idea! Thanks.
Please log in or create a free account to comment.This sounds like a great idea Jillee! Thanks for all your ideas and research. Love your website. I agree with others commenters…you are a smart cookie!
Please log in or create a free account to comment.AWESOME!! Very easy for organization-seeking-peopole. Thanks for the great tip.
Please log in or create a free account to comment.This is great. I’ve made quite a few of your diy beauty stuff. I might make labels so I can tell stuff apart.
Please log in or create a free account to comment.What an awesome idea! Thanks!
Please log in or create a free account to comment.I love your website with your crazy good ideas! Your a very smart cookie!
Please log in or create a free account to comment.I totally agree with Marie!
Please log in or create a free account to comment.This is great!
Thank you so much, Jillee!
Please log in or create a free account to comment.