0 Comments
Knowing how to clean tile floors the right way does so much more than just make them sparkle. It’s really about creating a healthier, more inviting home, starting from the ground up.
The secret is a simple routine: regular sweeping, mopping with the right pH-neutral cleaner, and giving those grout lines a little extra attention.
The Real Impact of a Clean Tile Floor
Before we get into the nitty-gritty, let’s talk about why this is a chore worth doing right. A genuinely clean tile floor is one of your home’s best defenses for a healthy indoor environment. Unlike carpet, which is notorious for trapping particles, tile gives dust, pollen, and other allergens nowhere to hide.
This simple fact can make a huge difference in your home’s air quality. I’ve seen studies showing that homes with tile floors can have a 20-30% reduction in airborne dust compared to homes with wall-to-wall carpet. That’s a big win for anyone with allergies or asthma – and we’ve got both in our family!
More Than Just a Pretty Surface
Beyond the health perks, good cleaning habits are really about preservation. Think about it: grit and dirt act just like fine-grit sandpaper, slowly scratching and dulling the finish on your beautiful tile every time you walk on it. Taking care of your floors protects your investment and keeps them looking fantastic for years to come.
And honestly, it has a ripple effect on the entire feel of your home.
Jillee’s Take:

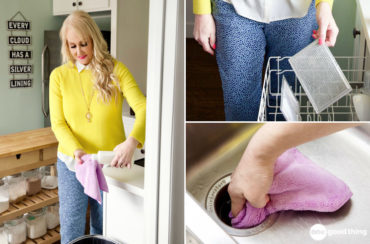
Get Started: Assembling Your Tile Cleaning Toolkit
Let’s be honest, having the right tools on hand can be the difference between a frustrating chore and a surprisingly satisfying deep clean. You don’t need a whole aisle of expensive gadgets, either. A smart, well-stocked toolkit is all it takes to get fantastic results.
The foundation for any effort to clean tile floors the right way starts with a great mop. While I love a good steam mop for sanitizing without harsh chemicals, it’s not always necessary for your regular, weekly clean.
More often than not, a high-quality microfiber mop is your best friend. Those tiny fibers are incredible at grabbing onto dust and grime instead of just pushing it all around. If you’re curious about the science behind it, you can learn more about why cleaning with microfiber cloths works so well.
Essential Cleaning Solutions And Tools
Once you’ve got your mop situation sorted, the next piece of the puzzle is the cleaning solution itself. For the vast majority of ceramic and porcelain tiles, a simple pH-neutral cleaner is the safest and most effective choice you can make. It cuts through the grime without leaving behind that dull, sticky residue or damaging your tile’s finish over time.
Now, for those deeper cleaning jobs—especially when you’re tackling grimy grout lines—a few specialized items are absolute game-changers:
- A Stiff-Bristled Grout Brush: The specific shape and firm bristles are designed to get right into the grout lines without scratching up your tile. An old toothbrush can work in a pinch, but a dedicated brush is just so much more efficient.
- A Squeegee: This simple tool is a secret weapon, especially in kitchens and bathrooms. It lets you pull all the dirty water into one spot for easy pickup, which keeps it from settling right back into your clean grout.
Here’s a little tip I’ve learned over the years: keep all these supplies in a small, dedicated caddy. When everything is in one place, you’re much more likely to tackle spills and scuffs as they happen, which keeps your floors looking their best between deep cleans.

The Pro Method for Flawless Tile Floors
Alright, let’s get to the fun part—putting everything into practice. This isn’t about some generic checklist; this is the process the pros use, but it’s simple enough for anyone to get that truly flawless finish at home. The secret isn’t scrubbing harder, it’s about working smarter.
It all begins with good prep work, a step I see people rush through all the time. Before a single drop of cleaner hits your floor, you have to get rid of every last bit of loose debris.
More Ideas You'll Love

Grab a soft-bristled broom or a vacuum with a hard floor attachment and clear away all the dust, pet hair, and crumbs. If you skip this, you’re just turning that dry grit into a muddy mess that gets pushed right into your grout lines.
Mastering the Wash and Rinse
Once the floor is clear, it’s time for the main event. This is where the two-bucket method becomes an absolute game-changer for anyone who really wants to clean tile floors the right way. You’ll need one bucket for your cleaning solution and a second one filled with plain, clean water just for rinsing your mop.
As you can see, keeping your wash water and rinse water separate is the key to preventing that hazy film and annoying streaks.
Here’s how you do it:
- Dip your mop into the cleaning solution and wring it out well. You want it damp, not sopping wet.
- Mop a small, manageable area, something like a 4×4 foot section.
- Now, before dipping it back into the cleaner, rinse that dirty mop head thoroughly in your second bucket of plain water.
- Wring it out completely, then you’re ready to dip it back into the solution for the next section.
This little technique ensures you aren’t just pushing dirty water around. You’re actually lifting the grime off the floor, which makes all the difference.
The final rinse is probably the most overlooked step, but trust me, it’s the secret to a streak-free shine. After you’ve washed the whole floor, dump your rinse bucket and fill it with fresh, clean water. Go over the entire floor one last time with your clean, damp mop to pick up any leftover soap residue.
Finally, you can let the floor air-dry. Or, if you want that extra sparkle, buff it dry with a clean microfiber cloth. This little bit of extra effort picks up any remaining moisture and leaves a beautiful, polished look. It sounds like a lot, but these professional methods are all about efficiency. It’s worth noting that in commercial settings, up to 60% of tile maintenance costs are spent on cleaning.
Using smarter methods at home saves you time and elbow grease. For some more brilliant ideas, check out these 11 cleaning hacks for floors that can make your routine even simpler.

How to Clean Different Types of Tile
I’ve learned this the hard way over the years: not all tile is created equal. Using the wrong cleaner can turn a simple weekend chore into a costly, permanent mistake. The real secret to getting your tile floors sparkling clean—without causing any damage—is to match your cleaning method to the material under your feet.
A little bit of know-how here goes a very long way.
More Ideas You'll Love

For instance, the vast majority of modern homes, including probably yours, have either ceramic or porcelain tile. There’s a good reason these are so popular—they’re tough, non-porous, and generally a breeze to maintain.
For most of us with ceramic or porcelain, a simple mix of warm water and a pH-neutral cleaner is all you’ll ever need. You can even get away with a diluted vinegar solution on these types without much worry, making them a fantastic low-maintenance choice.
Caring for Natural Stone Tile
Now, if you have natural stone like marble, slate, or travertine, it’s a completely different ballgame. These materials are porous and incredibly sensitive to chemicals. Acidic cleaners are their absolute worst enemy.
Using something like vinegar or a harsh chemical cleaner will literally eat away at the surface, creating dull spots called etches. The only way to fix that kind of damage is by calling in a professional to re-polish your floors. Ouch.
For these beautiful but delicate surfaces, keep your cleaning kit simple:
- A pH-neutral stone cleaner made specifically for natural stone.
- Warm water and nothing else for quick, daily wipe-ups.
- A soft microfiber mop to prevent scratching.
I can’t stress this enough: never use an abrasive scrubbing pad or any cleaner with acid on natural stone. A gentle touch is non-negotiable if you want to protect that gorgeous natural luster and your investment.
Handling Vinyl and Linoleum Tiles
Finally, let’s talk about vinyl and linoleum. While they’re known for being resilient, they still have their own set of rules.
Harsh, solvent-based cleaners can strip away their protective top layer, which eventually leads to discoloration and a dull, sad-looking finish. I’ve also seen abrasive powders create thousands of tiny scratches that just trap more dirt over time, making them impossible to get truly clean.
Your best bet here is a gentle approach. A simple solution of mild dish soap and water or a cleaner specifically designed for vinyl flooring works wonders. Just be sure to rinse with clean water afterward to remove any soap residue—that’s the key to maintaining that fresh look without hurting the floor’s finish.

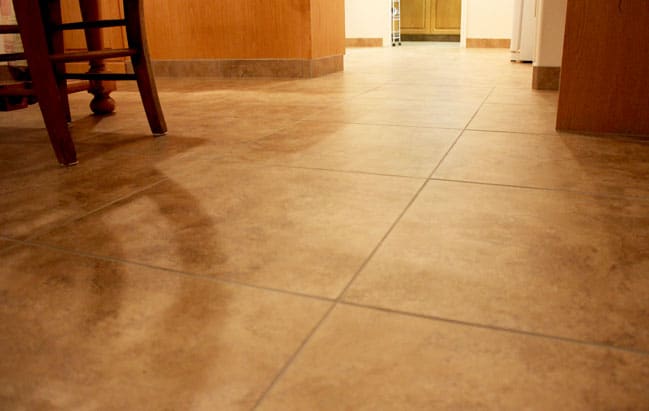
Conquering Those Grimy Grout Lines for Good
Let’s be honest, even the most beautiful tile can look downright dingy if the grout is stained and grimy. It’s a common frustration that can ruin the look of an otherwise spotless floor. But tackling it is probably easier than you think, and you don’t always have to reach for harsh chemicals to get the job done right.
A simple, effective paste made from a couple of household staples can work wonders. Just mix some baking soda with a little hydrogen peroxide until you get a thick, spreadable consistency, almost like toothpaste. Spread it right onto the grout lines and let it sit for about 10-15 minutes. You’ll see it start to bubble and fizz—that’s how you know it’s working its magic!
Scrubbing and Sealing for a Long-Lasting Clean
Once the paste has had time to do its thing, it’s time for a bit of elbow grease. A dedicated grout brush is your best friend here; its stiff bristles are designed to get deep into those porous lines without scratching your tile. In a pinch, an old toothbrush will work just fine for smaller spots.
For those really stubborn, set-in stains, a steam cleaner can be a fantastic, chemical-free weapon. The high-pressure steam blasts away built-up dirt and even kills mildew without any of those harsh fumes.
If you take away one thing, let it be this: always seal your grout once it’s clean and completely dry. This is the crucial step most people forget. A good quality grout sealer creates an invisible shield that repels dirt and moisture, making your next cleaning session infinitely easier.
For a more detailed walkthrough, you can find more great tips on the best way to clean grout that will make the whole process even simpler. This final step truly is the secret to keeping your grout bright and making all your hard work last for months to come.
FAQs About Cleaning Tile Floors
How often should I deep clean my tile floors?
For most homes, deep cleaning the grout can be planned every two to three months. However, in high-traffic areas like the kitchen, main entryway, or kids’ bathroom, consider increasing the frequency to every four to six weeks. This helps prevent grime from setting in and makes regular weekly mopping easier.
Can I use vinegar on my tile floors?
Vinegar works well on durable porcelain and ceramic tiles, as a diluted solution effectively removes soap scum and hard water spots. However, avoid using vinegar on natural stone surfaces like marble, travertine, and slate, as it can permanently damage them. Instead, use a pH-neutral cleaner specifically designed for natural stone.
How can I achieve a streak-free shine on my tile floors?
To prevent streaks caused by soap residue or hard water minerals, follow these tips:
1. Use the right amount of cleaner. Adhere to the bottle’s directions; more cleaner is not better.
2. Ensure a final rinse. Use a different mop head with plain, clean water for the last pass.
3. Dry the floor properly. Use a clean, dry microfiber cloth or mop pad to remove any remaining moisture.
What can I do if I have hard water in my area?
Consider using distilled water in your cleaning mix. It can help achieve a gleaming surface without leaving any residue behind.
Conclusion
Maintaining clean tile floors is essential for both the health and aesthetic appeal of your home. Adopting a regular cleaning routine with the right tools and techniques not only enhances air quality but also preserves the beauty and longevity of your flooring. From using a microfiber mop and pH-neutral cleaners to mastering grout care and accommodating different tile materials, these tips ensure your floors remain spotless and inviting.
What’s your best tile cleaning tip?