0 Comments

Desperately need to know how to clean front load washer? Trust me, I know that feeling. You open your front-load washer expecting freshly cleaned laundry, but instead, you get hit with a wave of that dreaded musty, mildewy smell. It’s a super common problem, so if this is happening to you, you’re definitely not alone!
I’ve learned that to really banish that smell for good, you need to deep clean the gasket, the dispenser drawer, and the drum itself. A simple combo of vinegar and baking soda often does the trick. The key is running a super-hot cleaning cycle and then making a habit of wiping down that rubber seal to stop moisture from sitting there.
Why Your Front Loader Smells and How to Fix It
The very design that makes your front loader so good at saving water and energy also creates the perfect storm for mold and mildew to take hold. I get it, it’s frustrating!
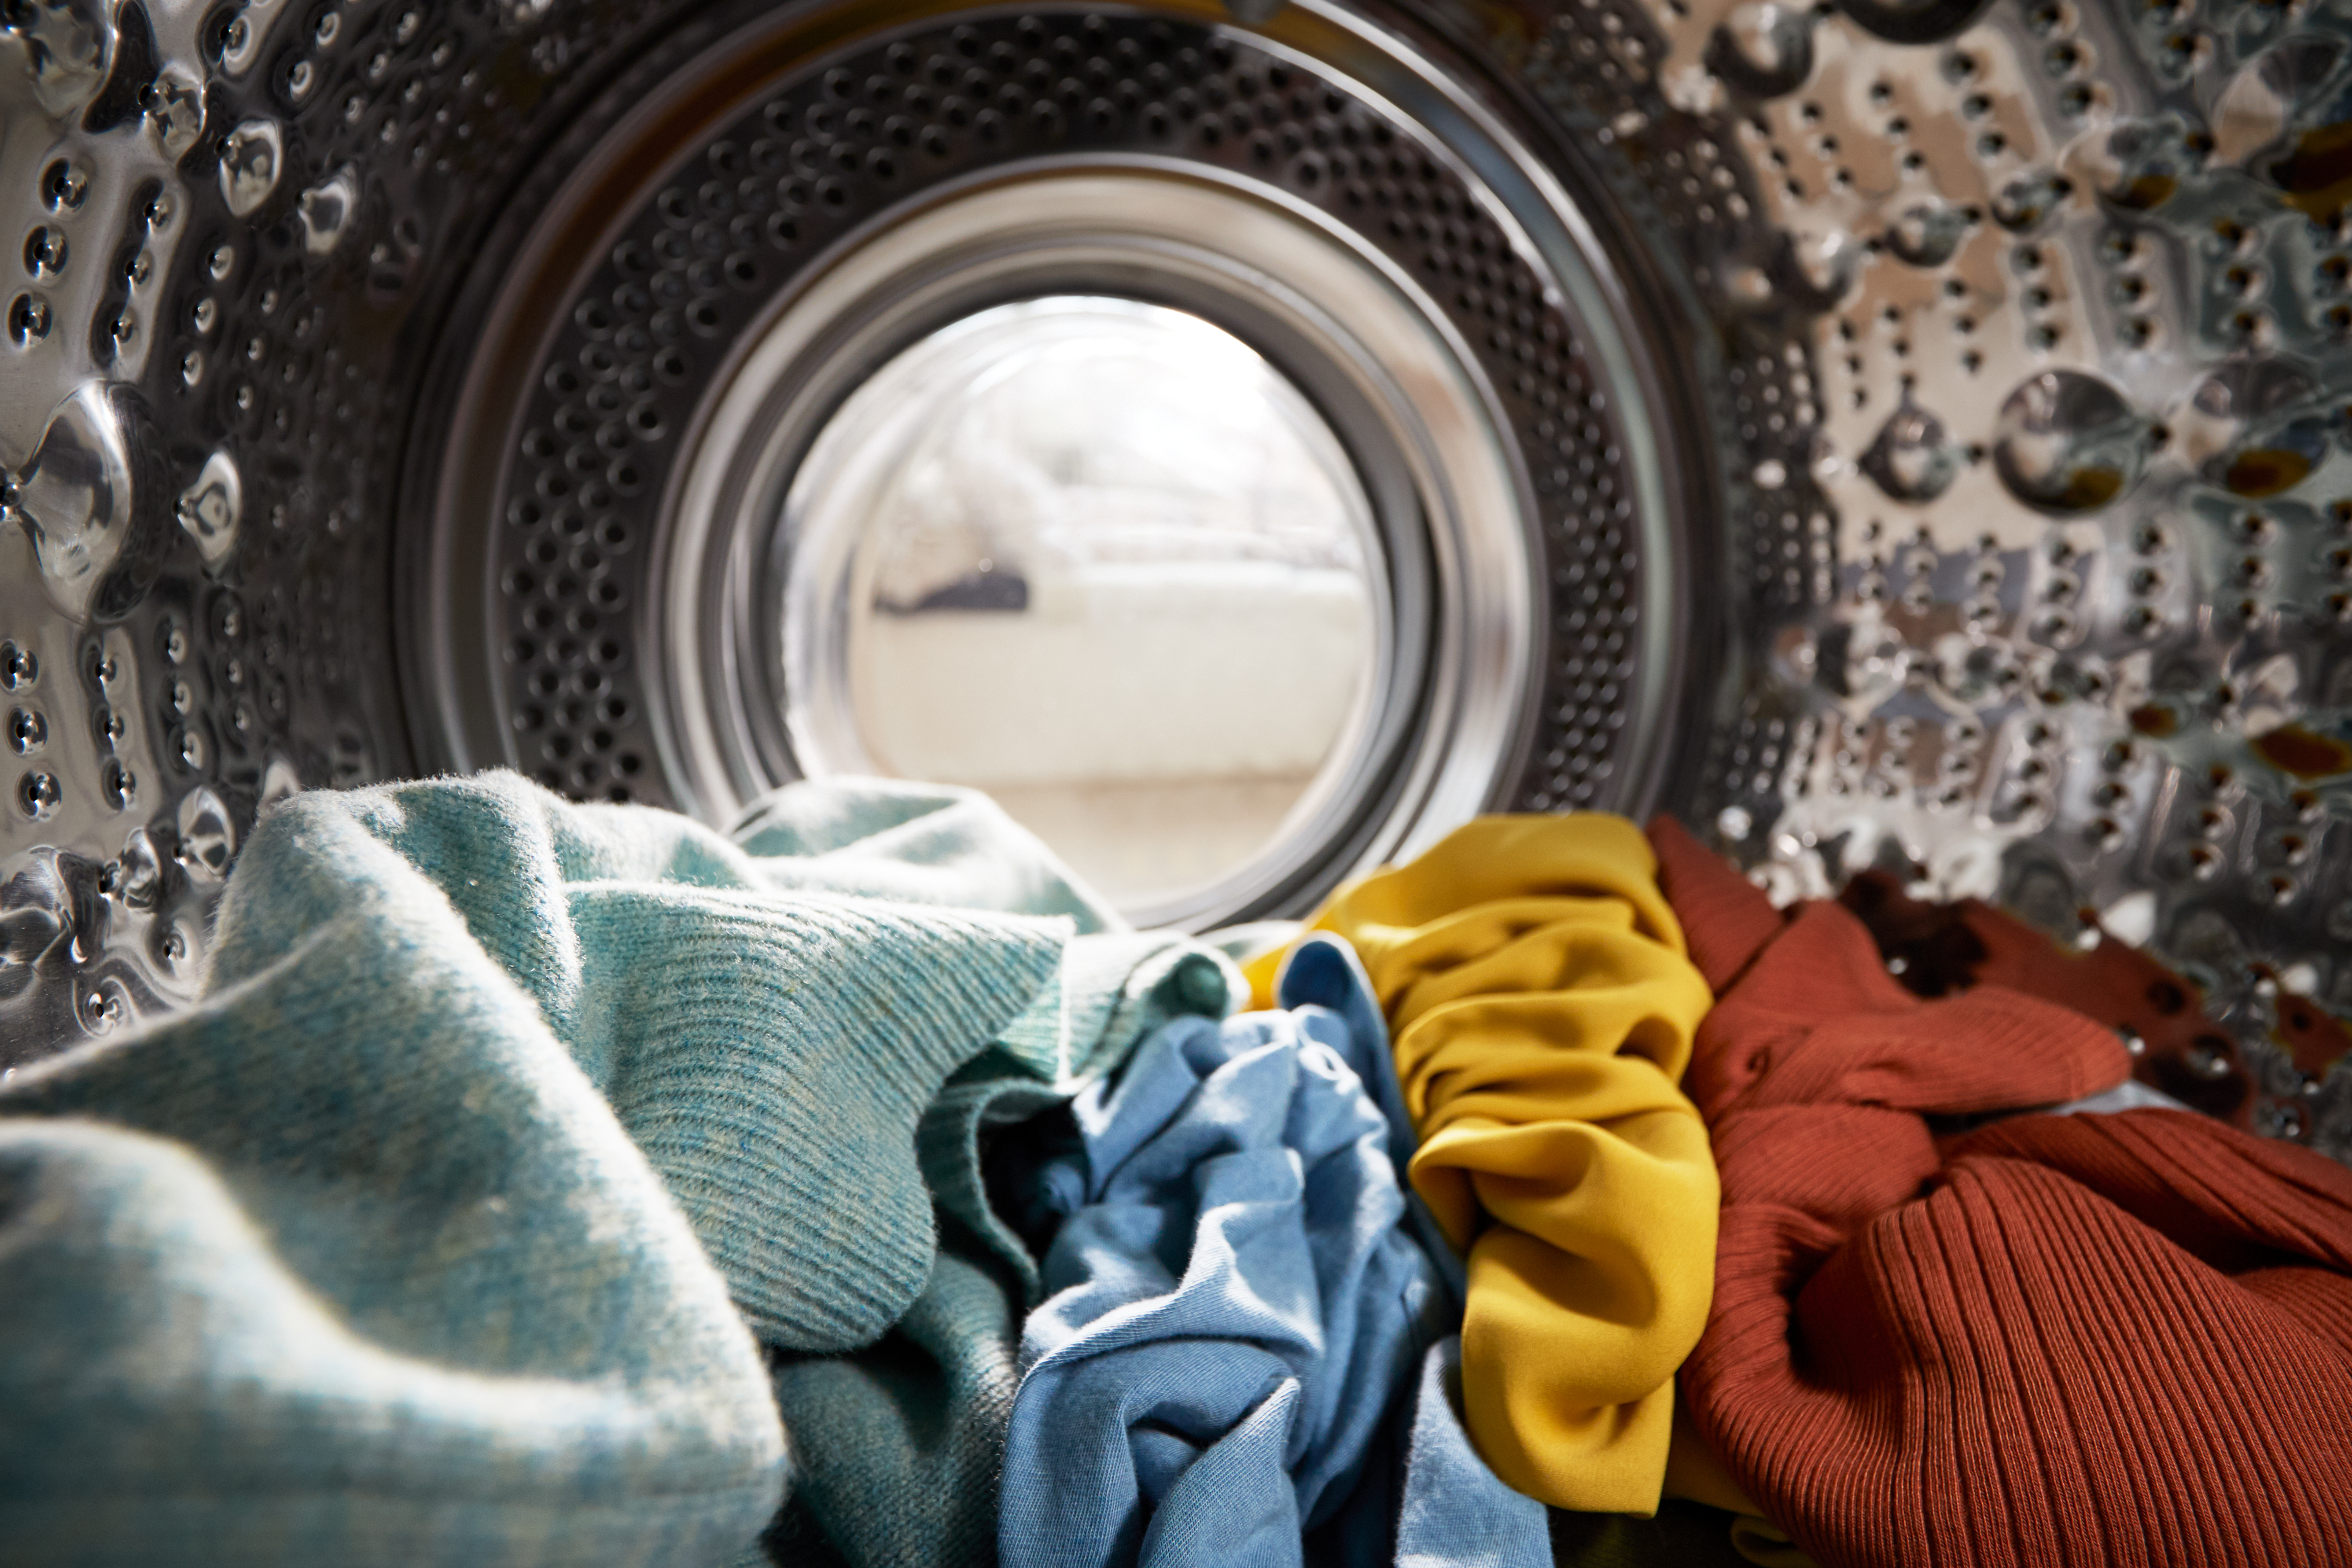
Front-load washers are fantastic because their horizontal drum and airtight door seal use way less water. But that tight seal also traps moisture, soap scum, hair, and all sorts of other gunk inside after a wash cycle. When that damp, dark environment is closed up, it becomes a breeding ground for the bacteria that causes that stubborn stink.

The Main Culprits Behind the Smell
So, where is that funky smell actually coming from? It’s usually a lovely combination of a few things building up over time. But don’t worry—once you know where the grime hides, you can get rid of it for good.
Here are the most common offenders:
- The Rubber Gasket: This is enemy number one! The folds in that rubber door seal are notorious for trapping water, lint, and hair. This creates a slimy, gross buildup that mildew just loves.
- The Drum: Believe it or not, leftover detergent and fabric softener can leave a film on the inside of the drum. This residue is a feast for odor-causing bacteria, especially if you mostly use cold water for your laundry.
- The Detergent Dispenser: Old soap scum and residue can clog up the dispenser drawer and the little cavity it slides into. This can lead to mold growth in a spot that’s totally out of sight.
The secret to a fresh-smelling washer isn’t just a single deep clean; it’s about understanding where the gunk hides and adopting a few simple habits to keep it from coming back.
The good news is, you don’t have to live with a stinky washer. While there are pros and cons to both washer types (you can read my full breakdown in my comparison of front-load vs. top-load washers), keeping your front loader fresh is totally manageable with the right routine.
Ready to get started? To make it easy, here’s a quick look at what we’ll be tackling.
Quick-Start Cleaning Checklist
This simple checklist breaks down the key areas we’re about to clean and the basic supplies you’ll want to have on hand. It’s everything you need to get your machine smelling brand new again.
| Area to Clean | What You Need | Why It Matters |
|---|---|---|
| Rubber Gasket | White vinegar, microfiber cloths | This is the #1 spot for mold and mildew buildup due to trapped moisture and debris. |
| Detergent Drawer | Hot water, old toothbrush | Prevents mold from growing in hidden compartments and ensures detergents dispense correctly. |
| Washer Drum | White vinegar, baking soda OR a descaler | Removes soap scum film and hard water deposits where odor-causing bacteria thrive. |
| Drain Pump Filter | Shallow pan, old towel | Catches lint, hair, and small objects that can cause clogs and nasty odors. |
Once you’ve got your supplies, you’re ready to dive in. Let’s tackle this together, starting right now.

Gathering Your Cleaning Supplies
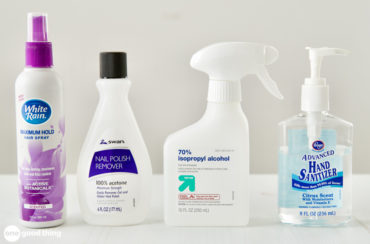
Before we get to scrubbing, we need to gather our tools! And here’s the good news: you probably don’t need to run out and buy a bunch of expensive, harsh chemicals. In fact, my favorite and most effective cleaning agents are likely already in your pantry.
I almost always start with my trusty cleaning duo: distilled white vinegar and baking soda. These two are incredible when it comes to cutting through grime and knocking out odors. The acetic acid in vinegar is fantastic for dissolving all that stubborn soap scum and mineral buildup from hard water.
Baking soda is a gentle abrasive and a natural deodorizer, which makes it perfect for scrubbing away gunk without scratching any surfaces. To see all the amazing things it can do, check out my guide on the benefits of adding baking soda to your washing machine.
More Ideas You'll Love

Choosing Your Cleaning Method
Now, I get it. Sometimes you just want the grab-and-go convenience of a store-bought cleaner, and that’s perfectly fine! There are some great commercial products out there designed specifically for front-load washers. They usually come in a few different forms, so you can pick whatever works best for you.
You’ll generally find these options:
- Powder Cleaners: These are often a really budget-friendly choice. They work very well at breaking down residue during a hot water cycle.
- Liquid Cleaners: Super easy to use—you just pour them right into the drum or dispenser. They’re great for dissolving quickly.
- Tablet Cleaners: The ultimate in convenience! Just pop one into the drum and run a cycle. No measuring required.
So, which one should you choose? It really just comes down to personal preference. I like to keep both natural and commercial options on hand.
My personal take? I love starting with my vinegar and baking soda method for regular maintenance. Then, every few months, I’ll use a commercial tablet for a super deep clean. It’s the best of both worlds!
To help you decide what’s right for your home, here’s a quick look at how the two approaches stack up.

Natural vs. Commercial Cleaner Showdown
Deciding between a DIY solution and a store-bought product often comes down to balancing cost, convenience, and ingredients. Both have their place in keeping your washer fresh and clean. This little table breaks down the main pros and cons of each.
| Cleaning Agent | Pros | Cons |
|---|---|---|
| Natural Cleaners | Very affordable, non-toxic, and you likely already have them. | May require a bit more manual scrubbing for heavily soiled areas. |
| Commercial Cleaners | Extremely convenient, powerful formulas for tough buildup, no mixing. | Can be more expensive and may contain harsher chemical ingredients. |
Ultimately, whether you reach for the baking soda or a specialty tablet, the most important thing is cleaning your washer regularly! Consistent maintenance is what will keep that musty smell from ever coming back.
My Four-Part Deep Cleaning Method
Ready to roll up your sleeves? This is my go-to, four-part process that gets my front-load washer looking and smelling brand new every single time. We’re going to hit every spot where that musty, funky smell likes to hide.
First, we’ll tackle the main culprit: the rubber gasket. Then, we’ll pull out the detergent dispenser for a much-needed scrub. After that, it’s time to clean the heart of the machine—the drum—using a powerful cleaning cycle. And for the final step, we’ll clear out the pump filter, a small part that so many people forget but makes a world of difference!
You really just have one decision to make before we start: are you going the natural route or using a commercial cleaner? Both work beautifully for this.
More Ideas You'll Love

Honestly, the method itself is what really matters here, not the specific product. So grab what you have on hand, and let’s get this done.

Cleaning the Rubber Gasket
That rubber gasket around the door? That’s where most of your stinky problems begin. It’s the perfect trap for moisture, hair, soap scum, and all the other gross stuff that mold and mildew love.
I like to mix equal parts water and white vinegar in a spray bottle for this job. Gently pull back the folds of the rubber seal—you might be surprised (and a little horrified) by what you find hiding in there! Spray the vinegar solution all over the gasket, making sure to get deep into every crevice.
Let it sit for a minute or two, then grab a microfiber cloth and wipe everything down. If you see some stubborn black spots, an old toothbrush dipped in your vinegar mix will help you scrub them away. Just be gentle!

Dealing with the Detergent Dispenser
Next up is the detergent dispenser. This little drawer gets surprisingly gunked up with old detergent and fabric softener residue, which eventually turns into a slimy, moldy mess.
Most dispenser drawers can be removed completely. If you’re not sure how, a quick look at your washer’s manual will show you the way. Once it’s out, let it soak in a sink of warm, soapy water for about 15-20 minutes.
After a good soak, use an old toothbrush to scrub away any leftover gunk from all the little compartments. And don’t forget to wipe down the inside of the machine where the drawer slides in—that spot gets grimy, too! Let the drawer air dry completely before you pop it back in.

Running a Drum Cleaning Cycle
Now for the main event: cleaning the drum itself. This step is crucial for washing away any hidden soap scum and mineral deposits that bacteria just love to feed on.
My favorite method is a one-two punch of vinegar and baking soda. Start by pouring two cups of distilled white vinegar directly into the washer drum. Next, add about a half-cup of baking soda into the detergent dispenser. You can see just how powerful this combo is in my guide on how to clean a washing machine with vinegar.
Run the washer on its hottest, longest setting. Many newer machines have a “Tub Clean” or “Self-Clean” cycle, which is perfect for this. The hot water, vinegar, and baking soda will work together to dissolve buildup and kill any lingering odors.
Clearing the Pump Filter
Last but certainly not least, we have the pump filter. This is a step so many people miss, but it’s critically important! This little filter catches lint, coins, hair, and anything else that could clog up your machine’s pump.
You’ll usually find the filter behind a small access door on the bottom front of the washer. Before you open it, place an old towel and a shallow pan underneath—trust me, some water is definitely going to come out.
Slowly unscrew the filter cap, letting the trapped water drain into your pan. Once it stops, pull the filter all the way out. Remove any debris you find (you might be shocked!) and give it a good rinse under warm water before screwing it securely back in place.
And that’s it—a completely refreshed washer!
Simple Habits to Keep Your Washer Fresh
Now that you’ve done all the hard work to get your washer sparkling clean, let’s talk about how to keep it that way! The real secret to a fresh-smelling washer isn’t just a deep clean every few months; it’s the little things you do after every single wash.
These simple, everyday habits take just a few seconds but make a world of difference. They stop mildew and musty smells from ever getting a chance to come back, which means less scrubbing for you later. It really is all about preventing problems before they start!

Let It Breathe
The single most important habit you can adopt is to leave the door ajar after you’re done with laundry for the day. This is a total game-changer, I promise! That airtight seal is great for keeping water in during a cycle, but it also traps moisture afterward, creating the perfect dark, damp playground for mildew.
By propping the door open, you allow air to circulate inside the drum, drying out any residual moisture. You don’t need to leave it wide open—just an inch or two is enough to break the cycle of stink.
I’ve found this one little trick prevents about 90% of the odor problems people have with front-load washers. It’s simple, free, and incredibly effective.
Promptly Remove Clean Clothes
I know how easy it is to start a load of laundry and then forget about it for hours, but try your best to move your wet clothes to the dryer as soon as the cycle finishes. Leaving a pile of damp laundry sitting in the drum is another fast track to that dreaded musty smell.
Not only does it help keep your washer fresh, but it also prevents your clean clothes from developing mildewy odors themselves. Set a timer on your phone if you need a little reminder! This simple step keeps both your machine and your laundry smelling wonderful.
Quick Daily Maintenance Wins
These tiny actions take almost no time but will save you from major cleaning headaches down the road. They’re a key part of my own routine for keeping appliances in great shape.
- Wipe the Gasket: After your last load of the day, grab a dry cloth and give the rubber gasket a quick wipe. Pay special attention to the folds where water loves to hide.
- Check the Dispenser: Give the detergent dispenser a quick peek. If you see any residue starting to build up, wipe it out before it becomes a bigger problem.
- Use the Right Detergent: Always use a detergent made for high-efficiency (HE) machines. Regular detergents create too many suds, leaving behind a residue that feeds odor-causing bacteria.
It’s clear that more and more of us are learning how important this upkeep is. I’m so glad that people are realizing that a little prevention goes a long way.
And if you’re looking for more tips, my complete guide on how often to clean your appliances can help you create a simple schedule for your whole home.
Troubleshooting Common Front Loader Problems
Even after a deep clean, sometimes little issues pop up. It’s beyond frustrating when you think you’ve solved the problem, only to find that faint musty smell creeping back or weird spots appearing on your clothes. Don’t panic! A little detective work is usually all it takes to get to the bottom of these front loader quirks.
Think of this as your go-to guide for those nagging problems that can drive you batty. I’ve run into just about all of them over the years, and most of the time, the fix is much simpler than you think. Let’s figure this out together.

The Musty Smell Comes Back Too Quickly
If you’ve scrubbed your washer from top to bottom and that mildewy funk returns in just a week or two, the culprit is almost always lingering moisture teaming up with detergent residue. It’s a stubborn combination that creates the perfect breeding ground for mold to grow right back.
The first thing I always check is the detergent drawer. It’s so easy to overdo it, especially with modern HE detergents that are incredibly concentrated. Those excess suds don’t fully rinse away, leaving a sticky film that bacteria just love to feast on.
Here are a few things to try:
- Cut back on detergent. Seriously, try using half the amount you normally would. You might be shocked to see your clothes come out just as clean with a lot less soap!
- Wipe the gasket daily. Get into the habit of giving the rubber seal a quick swipe with a dry cloth after your last load. This one simple step prevents water from pooling and becoming stagnant.
- Always leave the door ajar. This is my number one tip! Proper air circulation is the single best way to ensure the drum and gasket dry out completely between washes.
Seeing Residue or Spots on Clothes
Finding strange, greasy-looking splotches or a white, chalky film on your dark clothes? This is another classic sign of using way too much detergent or fabric softener. The machine simply can’t rinse it all away, so it ends up redepositing that gunk right back onto your laundry.
I once had this happen with my son’s dark t-shirts, and I was so confused! It turned out I was being a little too generous with my fabric softener, which was building up inside the drum and then transferring onto the clothes.
If you’re seeing this, run an extra rinse cycle on your next load. More importantly, scale back on your laundry products going forward. A cleaning cycle with two cups of vinegar will also do wonders to dissolve any existing buildup inside the machine.
The Machine Isn’t Draining Properly
Notice a small puddle of water sitting in the drum long after a cycle has finished? You likely have a clog on your hands. Don’t worry, this is usually a quick fix! The first and most common place to check is the pump filter we cleaned earlier.
Sometimes a small item like a kid’s sock or a clump of pet hair can slip past the drum and block the filter, keeping water from draining efficiently. Carefully clean it out again, and that should solve the problem 9 times out of 10. If the issue continues, you might have a clog in the main drain hose, which could require a bit more work to clear out.

Your Top Washer Cleaning Questions Answered
I get so many questions about keeping front-load washers sparkling clean, and I love answering them! It feels like we’re all in this together, trying to keep our homes running smoothly. So, I’ve gathered the most common ones right here to give you some quick, practical answers.
My goal is to clear up any confusion so you can feel totally confident in your cleaning routine. From how often you should deep clean to whether those little tablets are worth it, let’s dive into your most pressing questions.
How Often Should I Clean My Front Load Washer?
This is probably the number one question I get! For a deep clean—meaning you go through all four parts of my method—I recommend doing it once a month. A monthly cleaning is the sweet spot for preventing that musty smell from ever taking hold.
Of course, the little daily habits are just as important. Wiping down the gasket and leaving the door ajar after your last load will do most of the heavy lifting to keep things fresh between your monthly deep cleans.
Are Washing Machine Cleaning Tablets Worth It?
I think they can be! Those cleaning tablets are incredibly convenient. You just toss one in and run a cycle—no measuring vinegar or scooping baking soda required. They are formulated specifically to dissolve soap scum and mineral buildup, so they do a fantastic job.
My personal routine is to use my trusty vinegar and baking soda for most of my monthly cleanings because it’s so affordable. Then, about every third or fourth month, I’ll use a commercial tablet for an extra-deep, powerful clean. It’s the best of both worlds!
Can I Use Bleach to Clean My Washer?
Yes, you can, but with a little bit of caution. Chlorine bleach is a powerful disinfectant that is very effective at killing mold and mildew. However, it can be harsh on the rubber components of your machine if used too often.
If you have a serious mold problem in the gasket, a diluted bleach solution can work wonders. But for regular monthly maintenance, I personally prefer vinegar because it’s gentler.
And remember, never, ever mix bleach and vinegar! The combination creates a toxic gas.
What If I Have Never Cleaned My Washer Before?
First of all, no judgment here! Life gets busy, and it’s an easy chore to forget. The great news is that it’s never too late to start. If you’re dealing with years of buildup, you might just need to put in a little extra elbow grease the first time.
You may need to run two back-to-back cleaning cycles to really knock out the grime. For that first clean, I’d recommend using a commercial washing machine cleaner designed for heavy-duty jobs. Once you’ve done that initial deep clean, you can easily maintain it with a simple monthly routine. And for more cleaning ideas beyond the main components, you can discover all the surprising things to clean in your washing machine that you might have missed.
Also, for detailed care and specific instructions tailored to your model, you might find it helpful to dig out or look up your washer’s manual. It can be a lifesaver when you’re not sure how a specific part, like the detergent drawer, comes apart.
Have you battled a musty smell in your washer?